
Record a compliance status
In this article
Use compliance checks to record required checks for a client or matter, document the results, and keep a history of the work completed.
In bilabl, you can work through a check step by step, attach supporting documents or other evidence, add notes, and record the outcome. bilabl also keeps an activity history showing what was checked, who recorded each step, and when.
Before you start
You need permission to perform compliance checks. If you do not see the actions described in this article, ask your administrator to review your permissions.
For more information, see Set up compliance status.
The video below walks you through how to record a compliance status in bilabl.
Start a compliance check
You can open a compliance check from the client or matter you are working on to review its status, record the required steps, or view its history.
To open the check:
- Open the client or matter you want to work on.
- Select the compliance badge in the header.

The check opens in a panel on the right.
Use the Checklist tab to work through the check, or select the Activity Log tab to review its history.
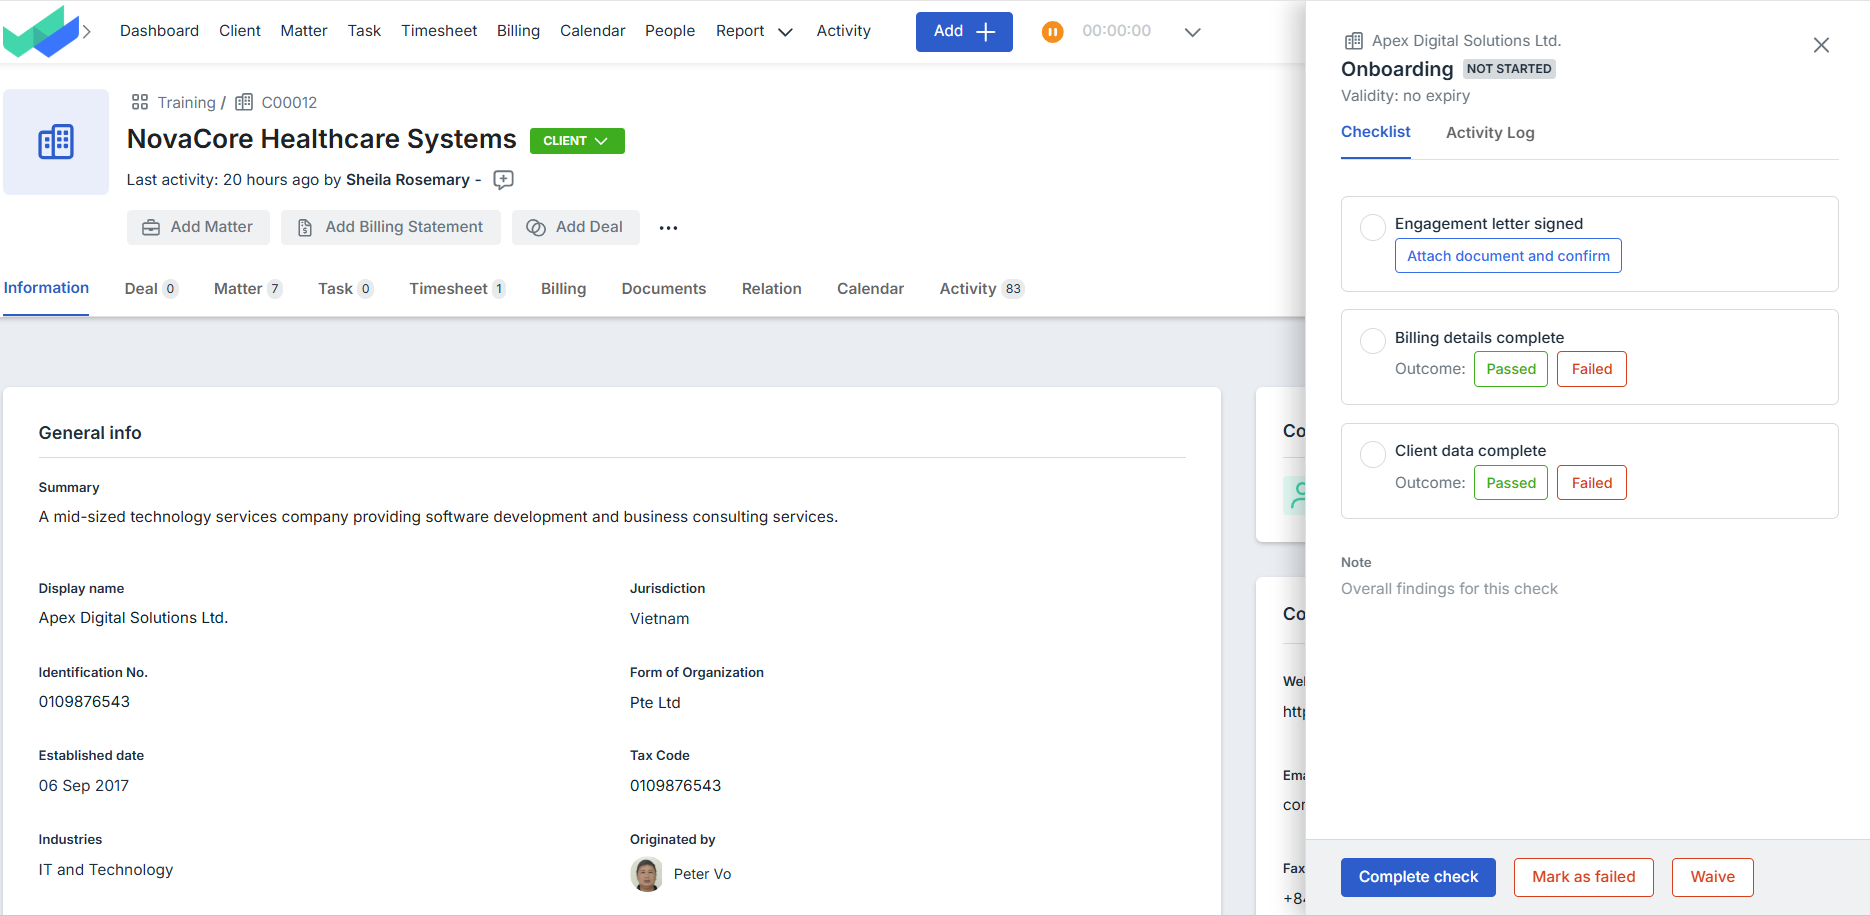
The checks available on a matter depend on how your firm has configured them:
- Conflict check can be recorded for a client and, if configured by your administrator, for each matter.
- AML/KYC and Onboarding are recorded at the client level. When you open them from a matter, they are read-only and remain associated with the client.
Work through the checklist
The Checklist tab shows the steps you need to complete.
Work through the steps and record the result for each one. Once you record the first step, the check changes to In progress, and your progress is shown in the panel header, for example 2/4.
Each step is labelled Manual, Document upload, or Action, depending on how the result should be recorded.
Record a Manual step
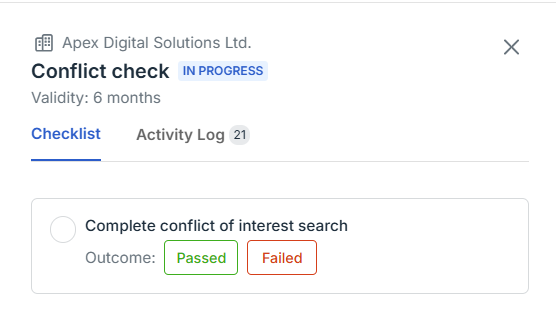
A Manual step does not require supporting evidence. Review the information provided, then select Passed or Failed to record the result.
Record a Document step
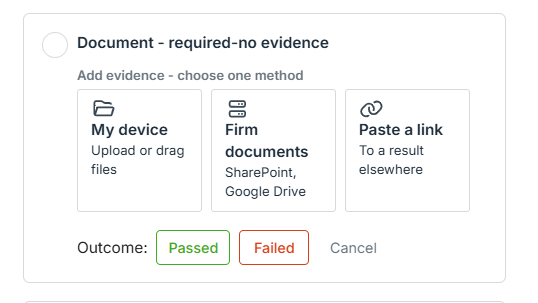
A Document step requires a document as evidence before you can record the result.
To record a Document step, follow the steps below:
- Select Attach document and confirm.
- Add the document using one of the available methods:
- My device: upload or drag a file from your computer.
- Firm documents: select a file from your firm's connected to SharePoint or Google Drive.
- Paste a link: paste a link to a document stored elsewhere.
- Select Passed or Failed to record the result.
Record an Action Step
An Action step either sends you to an external website or asks you to record the result directly in bilabl. What you do depends on how the step is configured.
If the step has an external destination, follow the steps below:
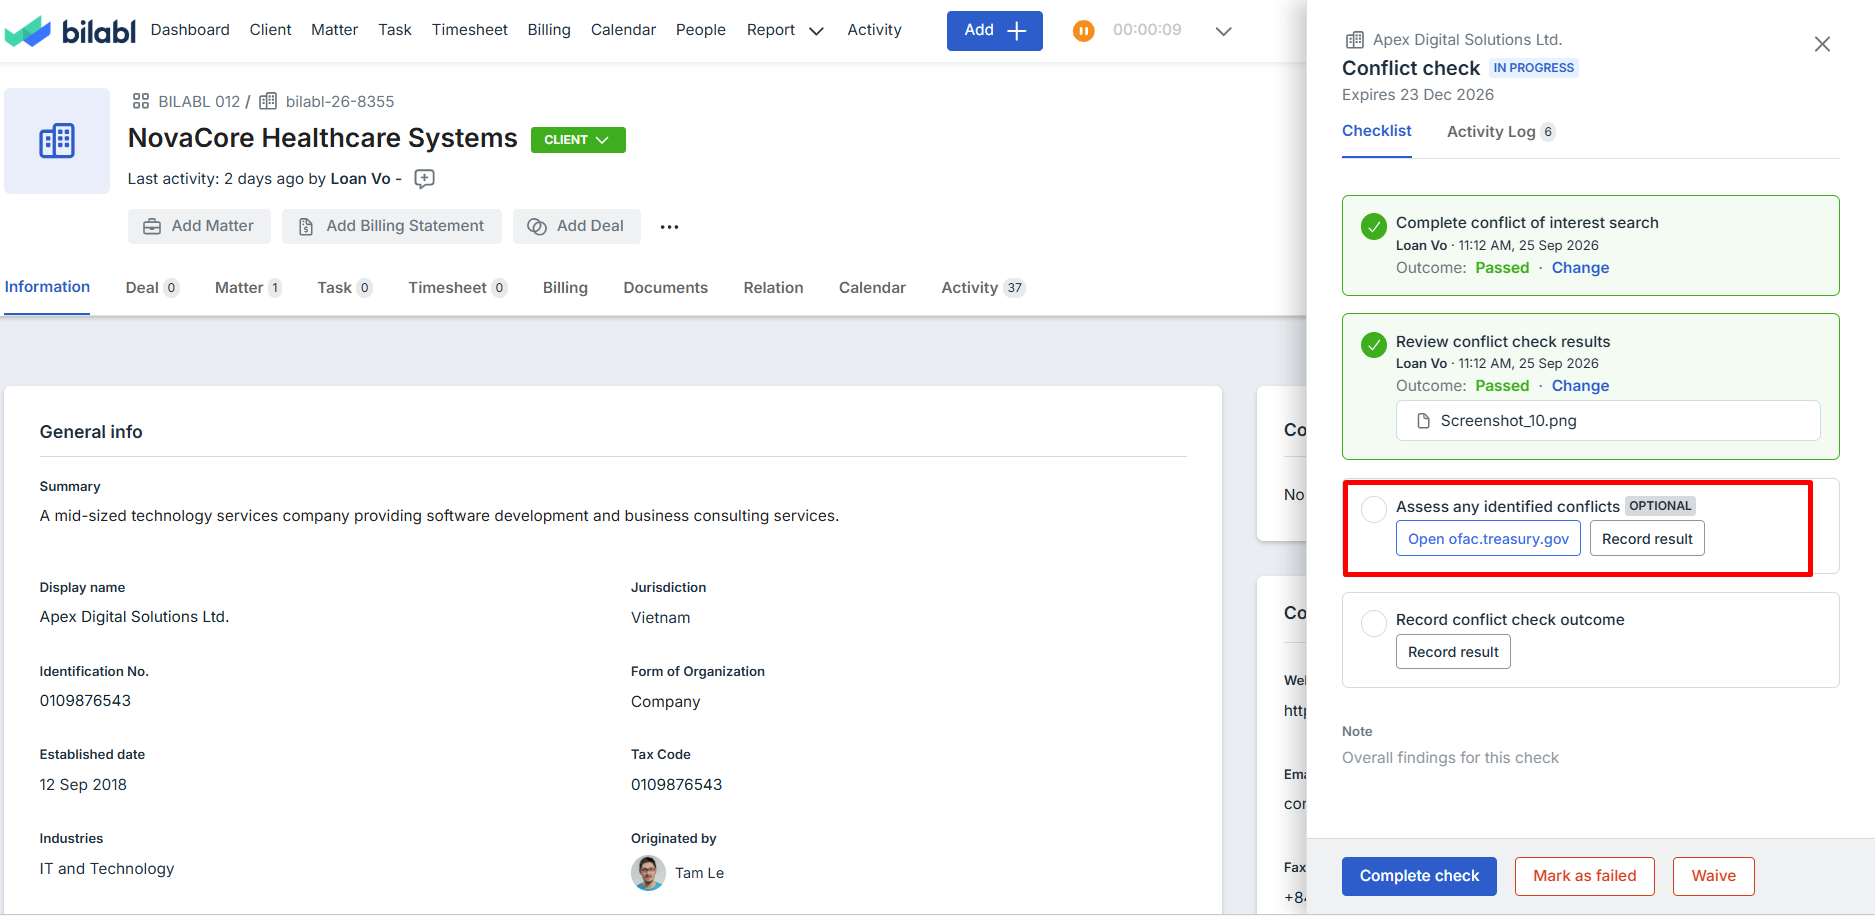
- Select the button that opens the external website. Its label is the destination configured by your firm, for example Open ofac.treasury.gov.
- Perform the required check on the external website.
- Return to bilabl and select Record result.
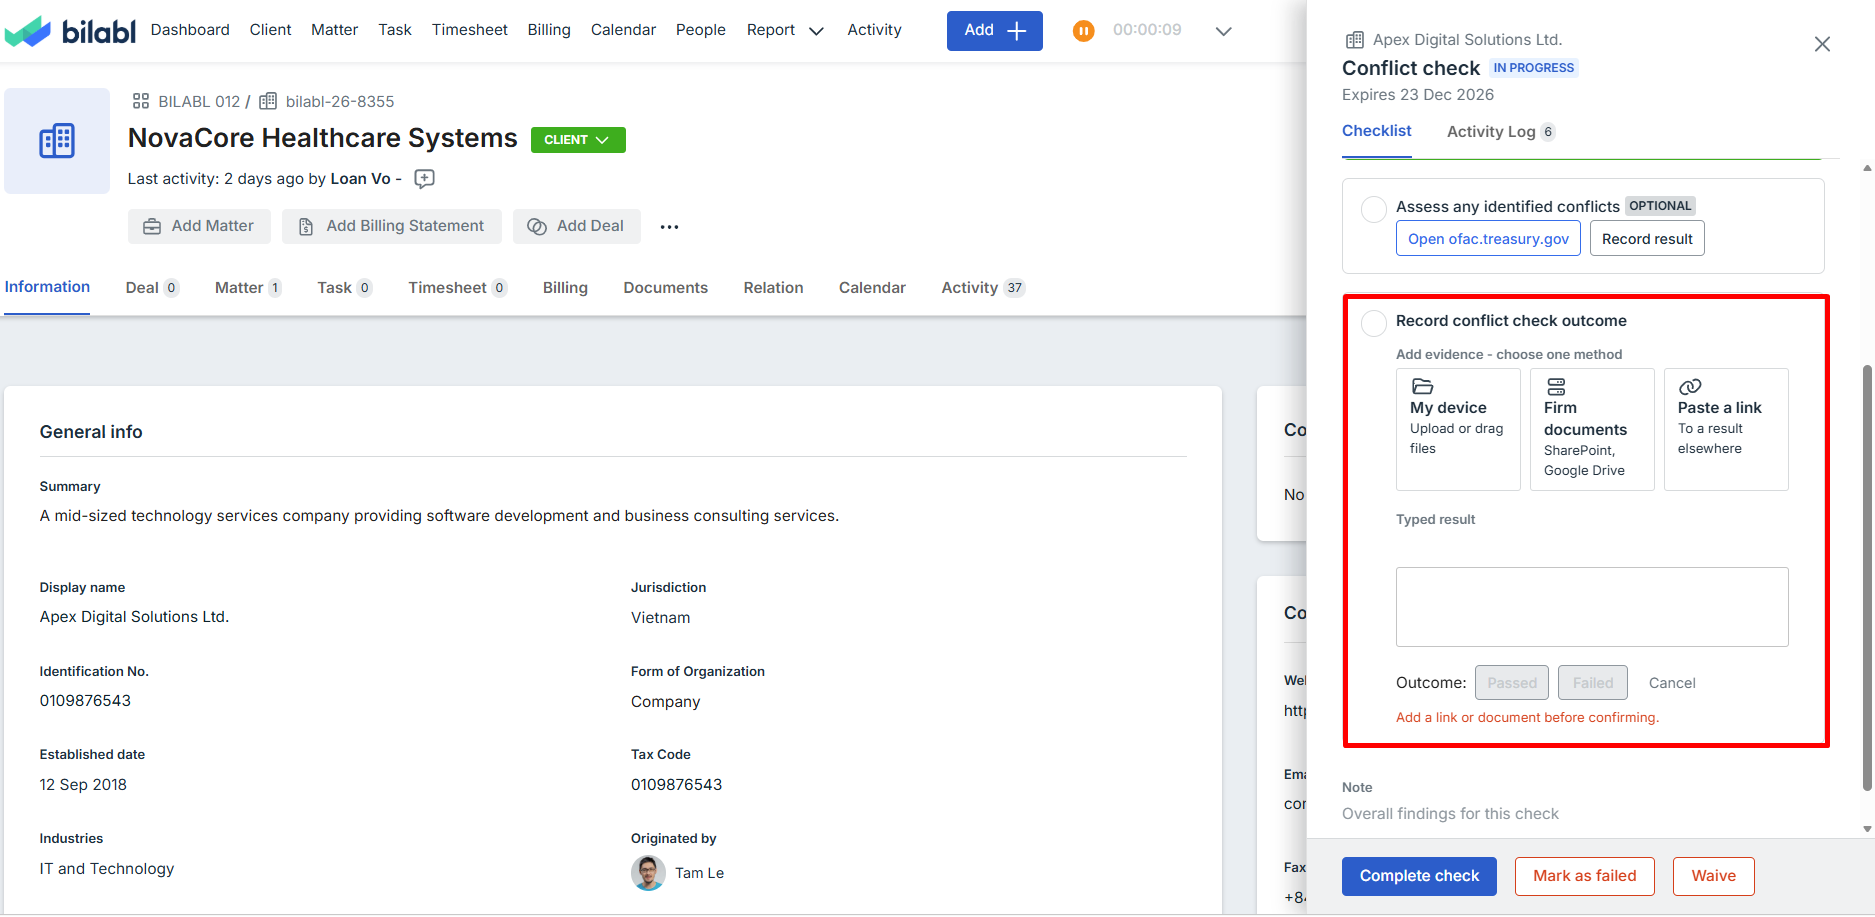
- Add supporting evidence if needed using one of the available methods:
- My device: upload or drag a file from your computer.
- Firm documents: select a file from your firm's connected to SharePoint or Google Drive.
- Paste a link: paste a link to a document stored elsewhere.
- Optionally enter additional details in the Typed result box.
- Select Passed or Failed to record the result.
If the step does not have an external destination:
Record the result directly in bilabl. Add supporting evidence using My device, Firm documents, or Paste a link, or enter the result in the Typed result box. Then select Passed or Failed.
Change a recorded result
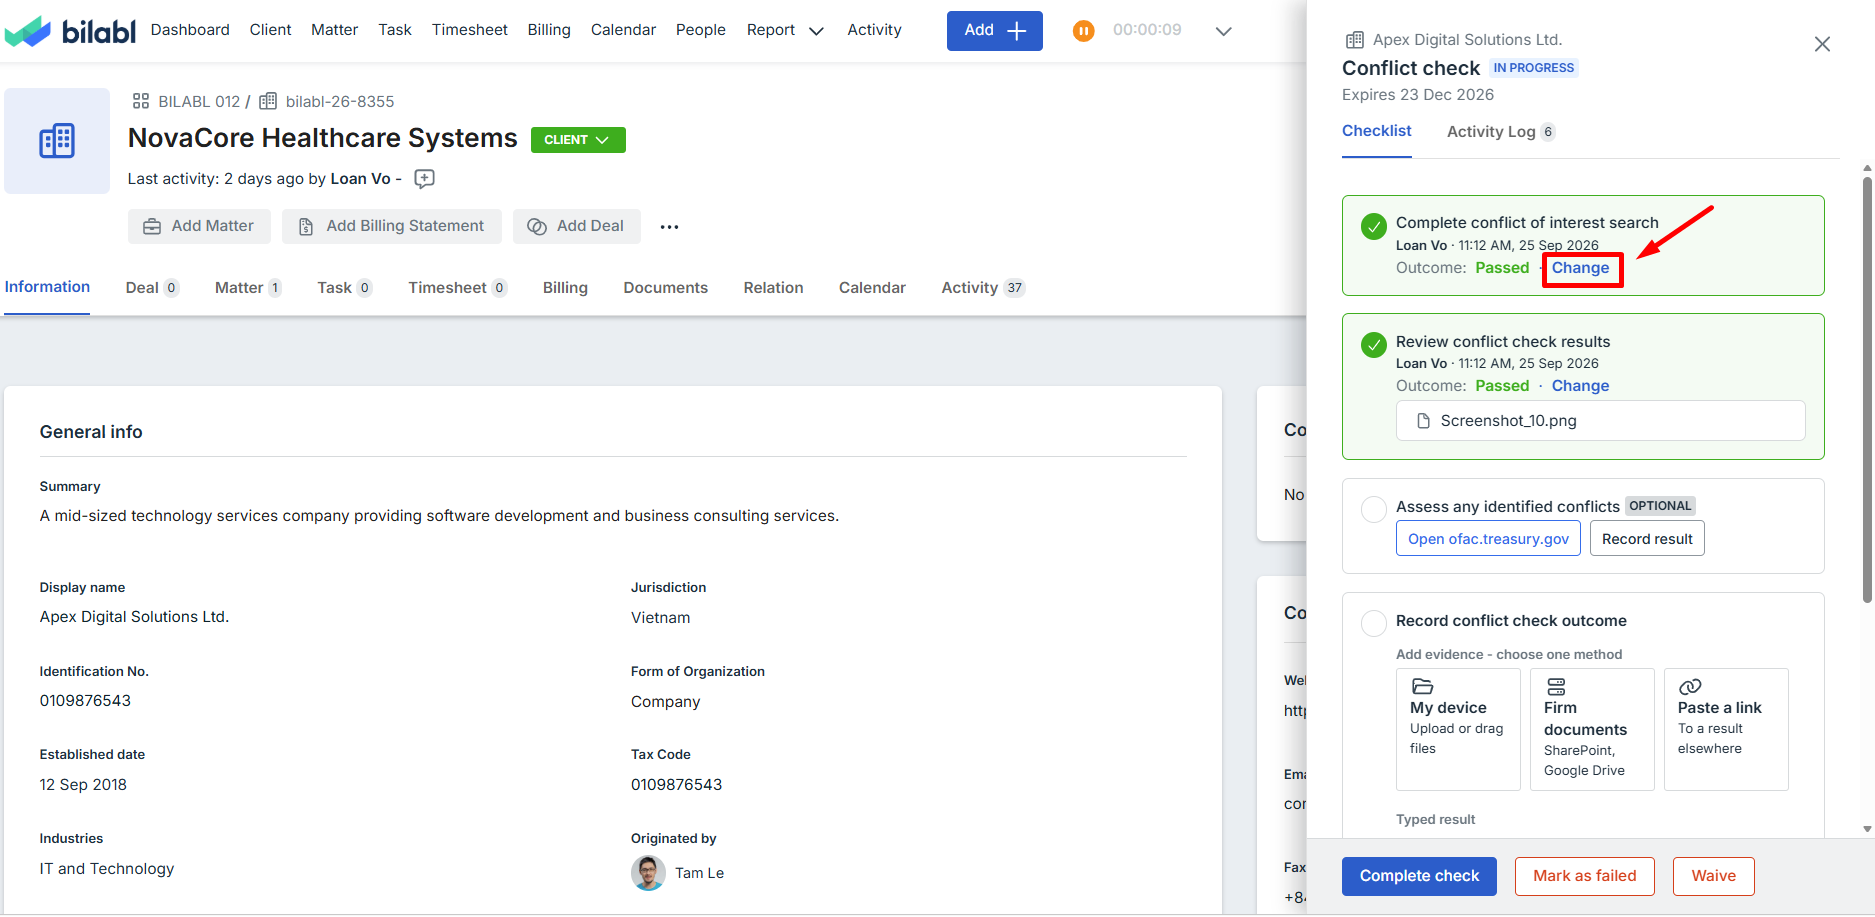
Once you record a step, it collapses into a summary card showing the result, who recorded it, and when.
To change the result while the check is still open, select Change on the summary card and record the step again.
You can change one step at a time.
Record the check outcome
After you have worked through the required steps, record the overall outcome of the check using the buttons at the bottom of the panel.
Mark the check as Passed
When all required steps are marked Passed, select Complete check.
The check is set to Passed, and bilabl applies the validity period configured by your administrator to set the next expired date.
Steps marked OPTIONAL are not mandatory. You can skip them and still record the check outcome.
Mark the check as Failed
If the check cannot be passed, select Mark as failed.
If no step has already been marked Failed, bilabl asks you to provide a reason.
The check is then set to Failed.
Waive a check
If a check does not need to be performed, you can waive it, provided you have permission to do so.
To waive a check:
- Select Waive.
- Choose a reason.
- Add an explanation.
- Confirm the waiver.
The check is set to Waived, and bilabl records your name and the reason.
A check cannot be waived once it has been passed.
For more information about check statuses, see Compliance status.
What happens after you record the outcome
Once you record the check's outcome, its checklist and note become read only. The activity history remains available for reference.
To run the check again, select Record new check at the bottom of the panel.
Add a note
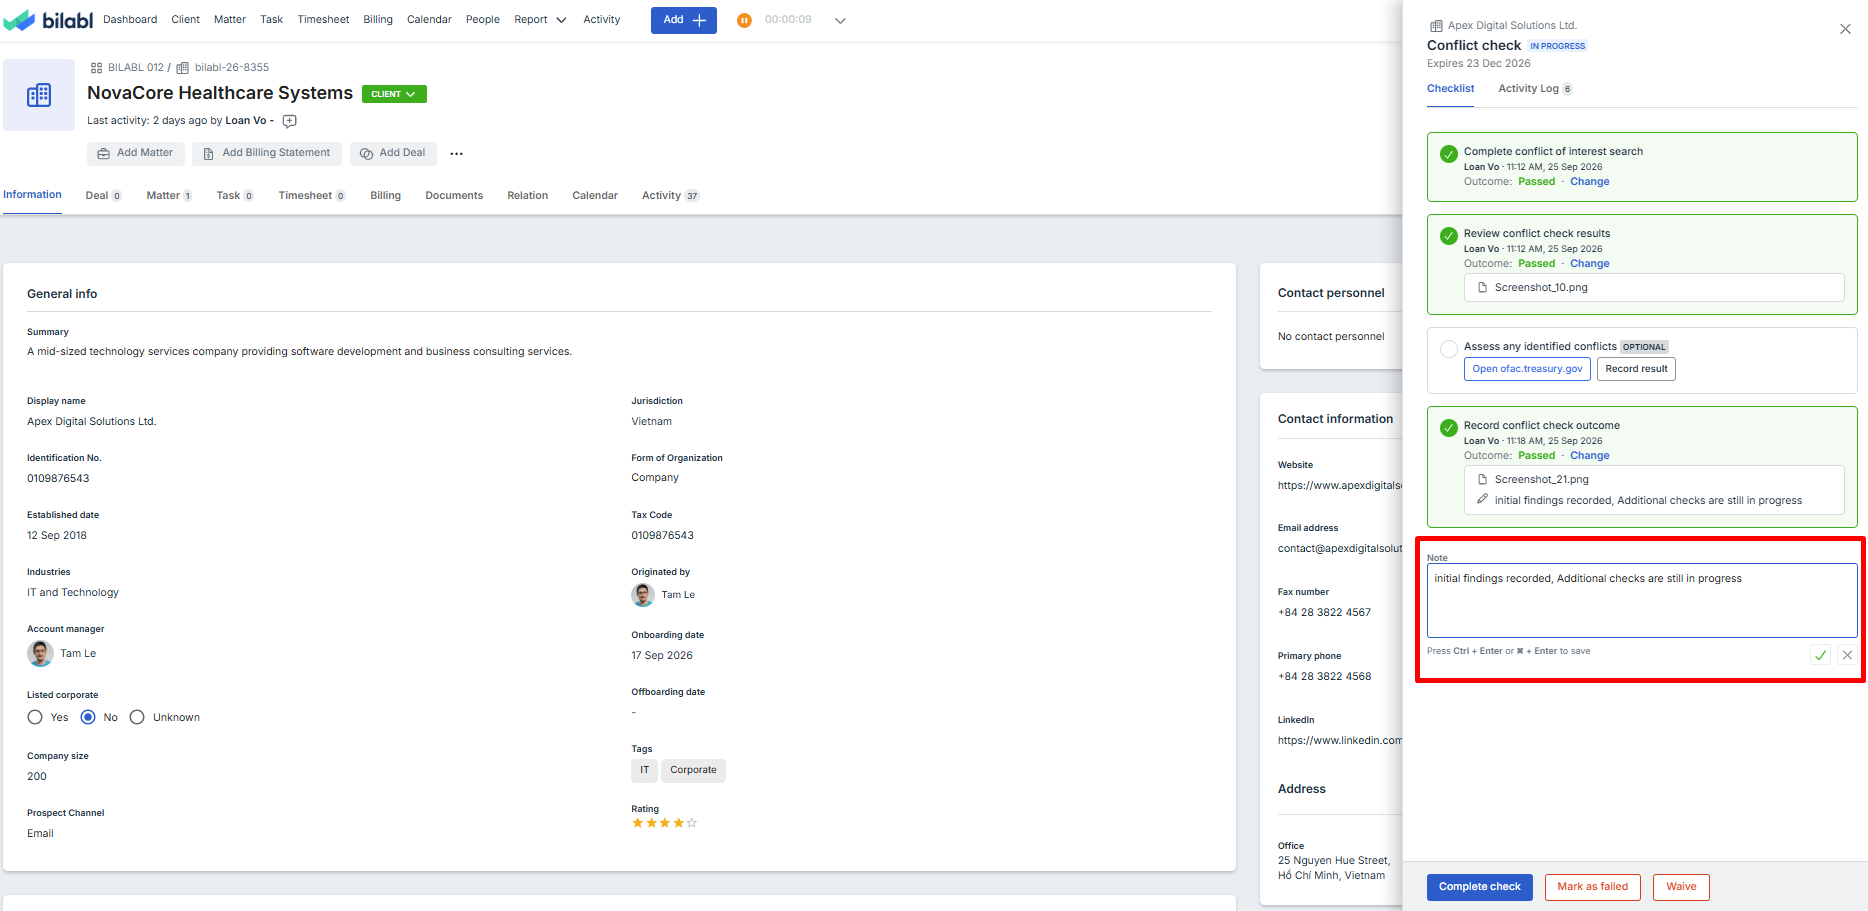
Use the Note field to record overall findings for the check, such as an important finding, supporting information, or why a step took longer than expected.
Enter your note in the Note box and save it.
You can edit the note while the check is still open. Once you record the outcome, the note becomes read only.
Review the check history
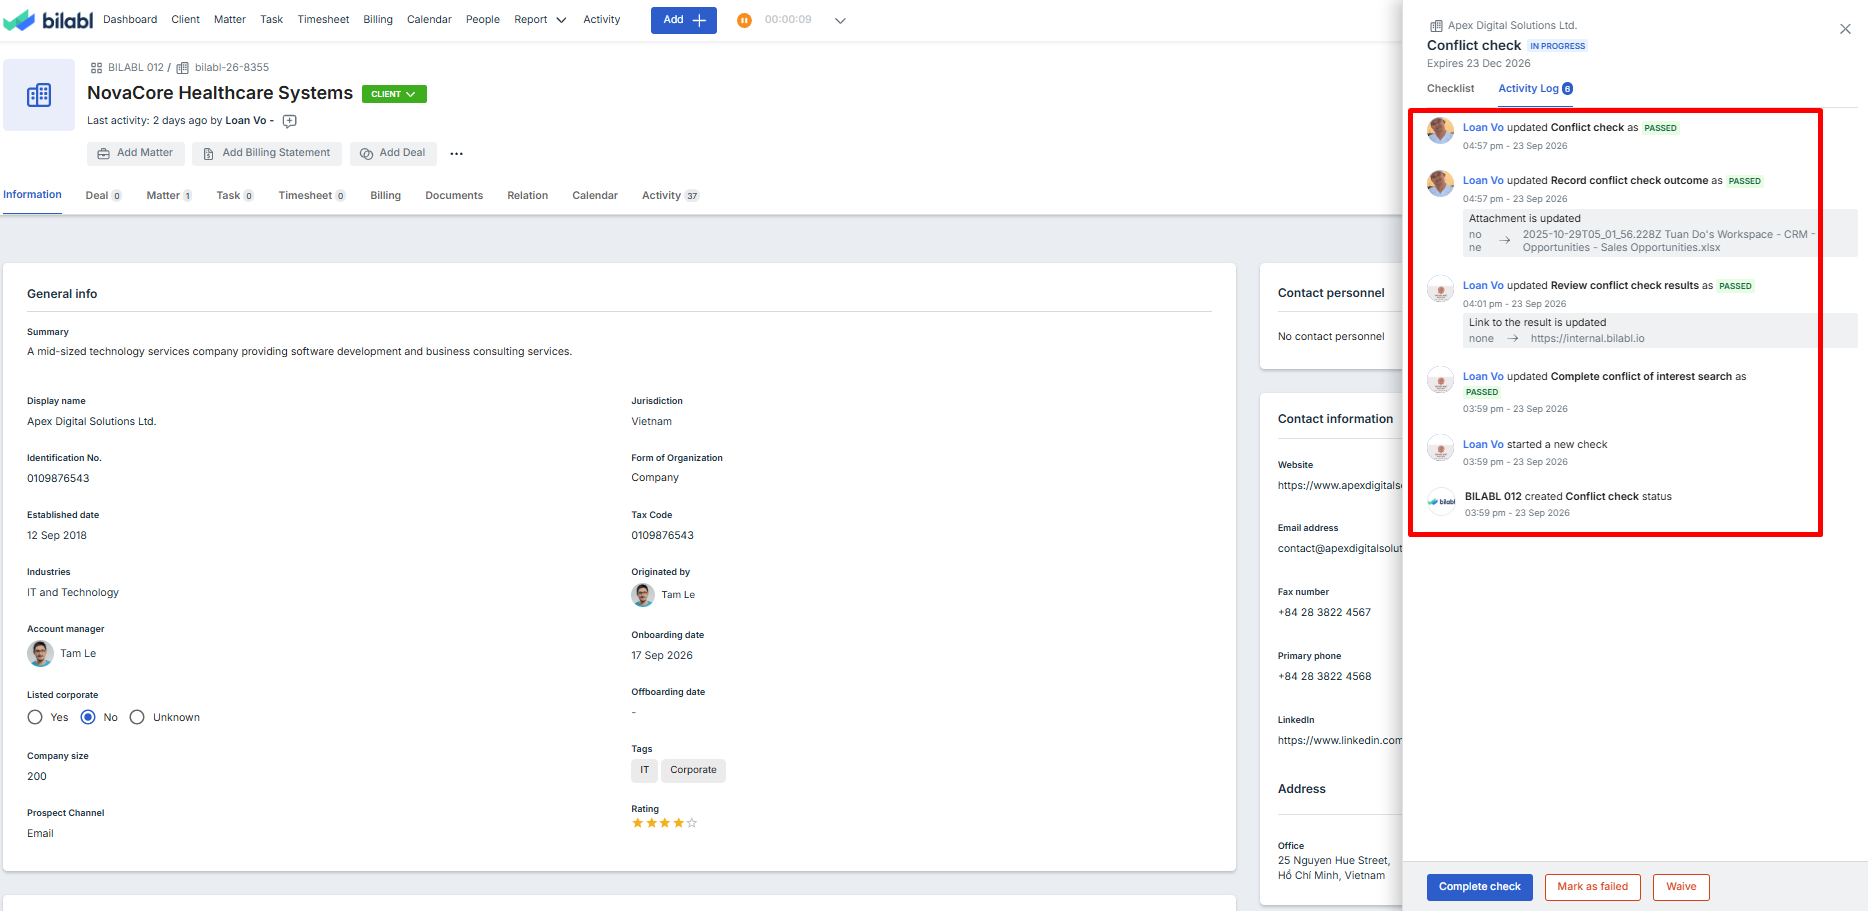
The Activity Log provides a record of what happened during the check.
Open the Activity Log tab to see the actions taken, who performed them, and when.
The history includes:
- Each recorded step
- The note added to the check
- The recorded outcome (Passed, Failed, or Waived)
The activity history cannot be edited or deleted. It remains available even after you record a new check, so you can refer back to previous checks when needed.
Renew compliance check
A Passed or Waived check with a validity period has a expired date based on the validity period configured for that check.
The client owner receives a reminder 30 days before the expired date and again on the expired date.
During the last 30 days before the expired date, the compliance badge shows Expiring soon. Once the expired date passes without a new check being recorded, the badge changes to Expired.
To renew a compliance check:
- Open the compliance check.
- Select Record new check.
- Work through the checklist and record each required step.
- Record the Complete check.
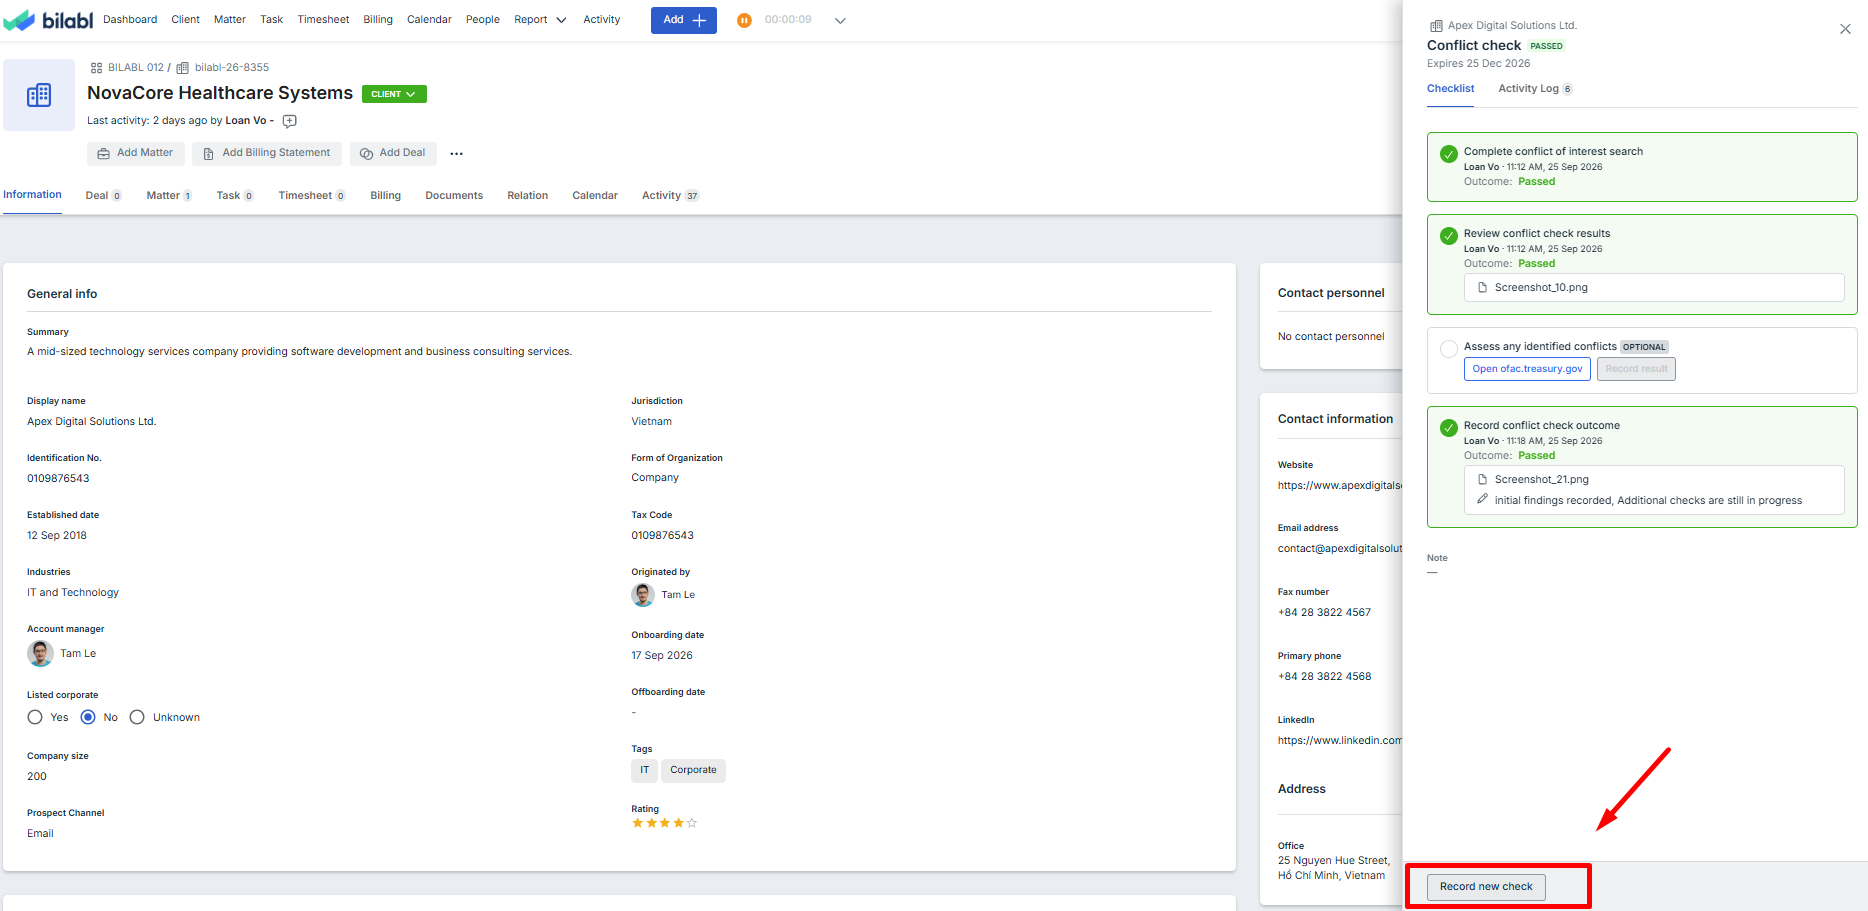
Once the new check's outcome is recorded, bilabl applies the configured validity period and sets a new expired date. The previous check remains available in the activity history.


