
Setup compliance status
In this article
Administrators can configure Compliance status to match the compliance processes used by your firm. You can enable the add on, choose which checks to use, define who can perform or waive them, set validity periods, and build the checklist for each check.
Your Compliance status settings apply across the firm.
For an overview of how compliance status works, see Compliance status.
Before you start
You need administrator access to configure Compliance status.
Before you begin, decide:
- Which compliance checks your firm needs
- Whether each check applies to the client, each matter, or both
- How long completed checks remain valid
- Which users can perform each check
- Which users can waive a check
- Which checklist steps should be completed and what evidence is required
The video below walks you through how to setup compliance status in bilabl.
Turn on the Compliance status
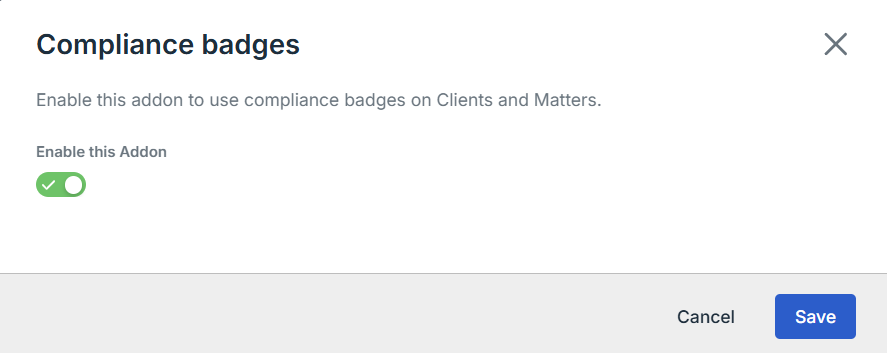
Compliance status is available as an add-on. Turn it on before configuring your compliance checks.
- Go to Settings > Addons.
- Find Compliance status, then select Enable.
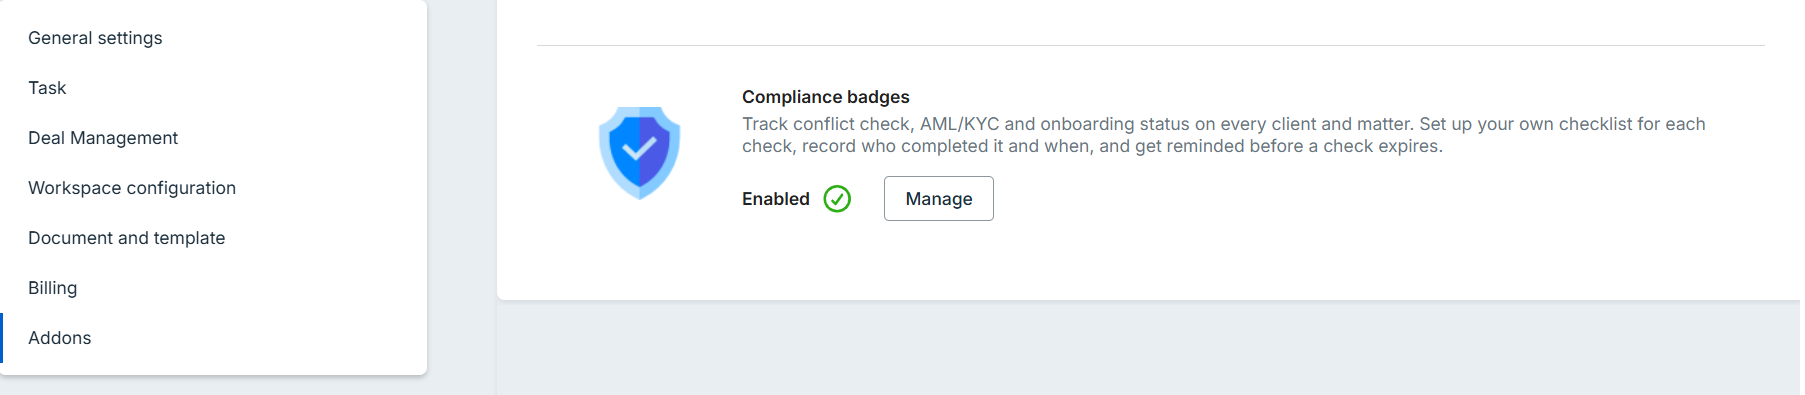
Once enabled, the add-on shows Enabled with a Manage button.
Configure a compliance check
You can configure each check from the Compliance tab under Settings > Workspace configuration.
Conflict check is enabled by default. AML/KYC and Onboarding are available but must be enabled by an administrator.
The following steps use Conflict check as an example.
1. Enable the check: Use the toggle next to each check your firm uses.
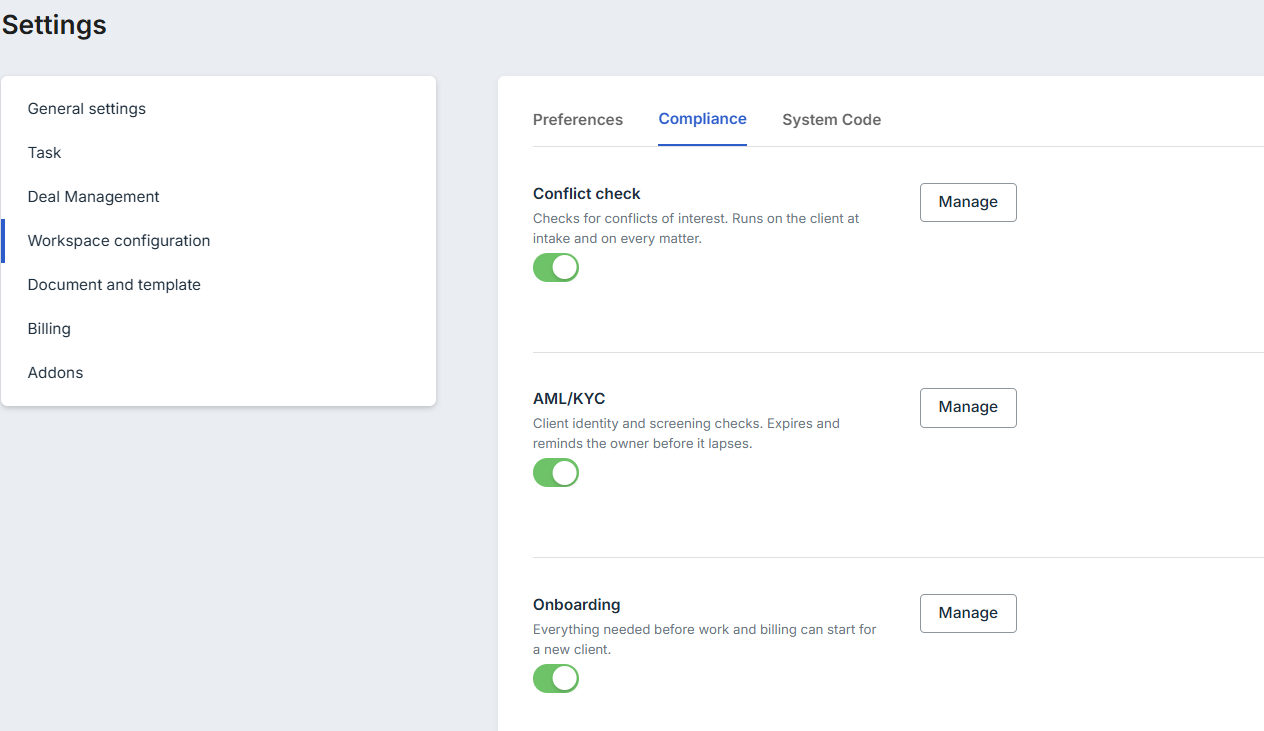
2. Open the check settings: Select Manage next to a check to open its settings.
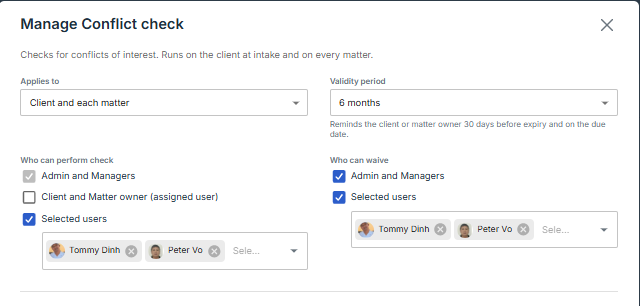
3. Choose where the check applies: Under Applies to, choose whether the check should be recorded for both the client and its matters, or for the client only.
- The client and each matter: the client has its own check, and each matter has a separate check.
- The client only: the check is recorded once on the client and does not have separate matter-level checks.
4. Set the validity period: Under Validity period, choose how long a completed check remains valid before it needs to be completed again.
- Never expires: The check remains valid until a new check is recorded.
- A set period (3, 6, 12, 24, 36, or 60 months): the check expires after the selected period.
For checks with a set validity period, bilabl shows Expiring soon during the last 30 days before the expired date and Expired after the expired date. The client owner also receives a reminder 30 days before the expired date and again on the expired date.
5. Choose who can perform the check: Under Who can perform check, define who can record the results and complete the check. Admins and Managers are always included. You can also allow:
- Client and Matter owner (assigned user): the user assigned to the client or matter can perform the check.
- Selected users: choose specific users who can perform the check.
6. Choose who can waive the check: Under Who can waive, define who can intentionally skip the check. You can allow Admins and Managers, Selected users, or both.
When a check is waived, the user must provide a reason. The waiver is recorded in the compliance history.
Configure AML/KYC and Onboarding
AML/KYC and Onboarding use the same configuration options as Conflict check, with one difference: they always apply to the client.
Instead of Applies to, these checks have a Display label. You can rename the label to match your firm's terminology, such as Client due diligence.
You can then configure the validity period, who can perform the check, and who can waive it in the same way as Conflict check.
Build the checklist
Each compliance check includes a checklist that defines the steps your team follows to complete it. Each check starts with a set of default checklist items. You can edit these items or add new ones to match your firm's process.
To add a checklist item, select Add checklist item, then configure the following:
- Name: Enter a name that clearly describes what the user needs to complete. For example: Client data complete, Engagement letter signed, Identity document verified.
- Type: Choose how the user should record the result.
- Required: Turn on Required if the item must be passed before the check can be completed. Optional items are marked with an OPTIONAL label.
- Evidence required: Turn on Evidence required if the user must attach supporting evidence, such as a file or link, before recording the item.
- Edit the checklist:
You can update the checklist at any time to reflect changes to your firm's compliance process.
- Reorder an item: drag the handle beside the item to move it.
- Rename an item: edit the item's name.
- Delete an item: select the Delete (X) icon beside the item. The item is removed from the checklist immediately.
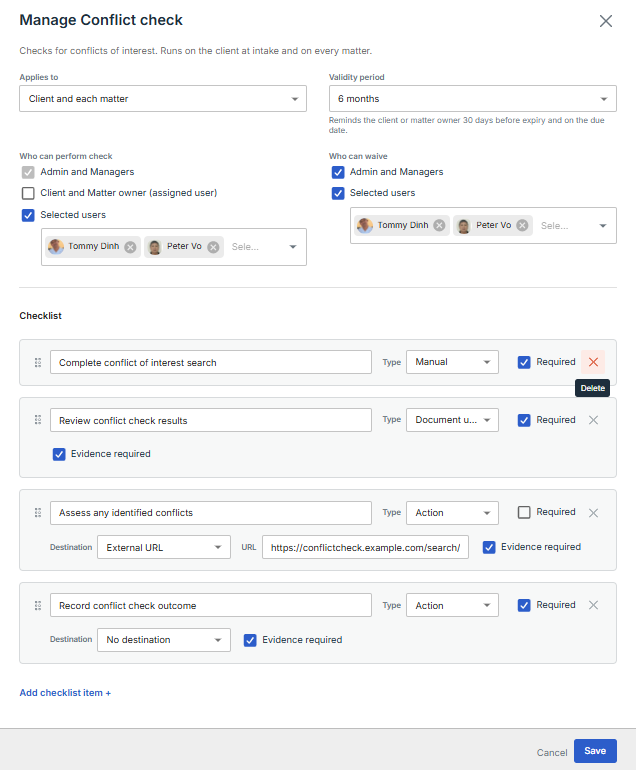
When you have finished configuring the check, select Save.
Your compliance checks are now ready for your team to use on clients and matters. To learn how to record a check, see Record a compliance status.


