Connect Your AI Agent to bilabl
In this article
After an Administrator enables AI Connect for your firm, see Set Up AI Connect, each user can connect their own AI agent to bilabl. You need your own account with that AI agent, for example a Claude or ChatGPT account. Some AI agents have limits on custom connectors, such as a limit on how many you can add or which accounts can add them, as noted in each example below.
Once connected, your AI agent works with your own bilabl access and within the Access levels your firm sets. For what AI Connect is, what AI Connect costs, and the risks, see AI Connect Overview.
This article explains the steps that every AI agent follows, with examples for Claude, ChatGPT, and Gemini. Other AI agents that support MCP may also connect, but their steps can be different.
Connect your AI agent
Every AI agent has its own screens, but connecting to bilabl works the same way in each one.
To connect your AI agent:
- In your AI agent, add a custom connector named bilabl with the address https://mcp.bilabl.io.
- When your AI agent asks you to sign in, sign in with your own bilabl account.
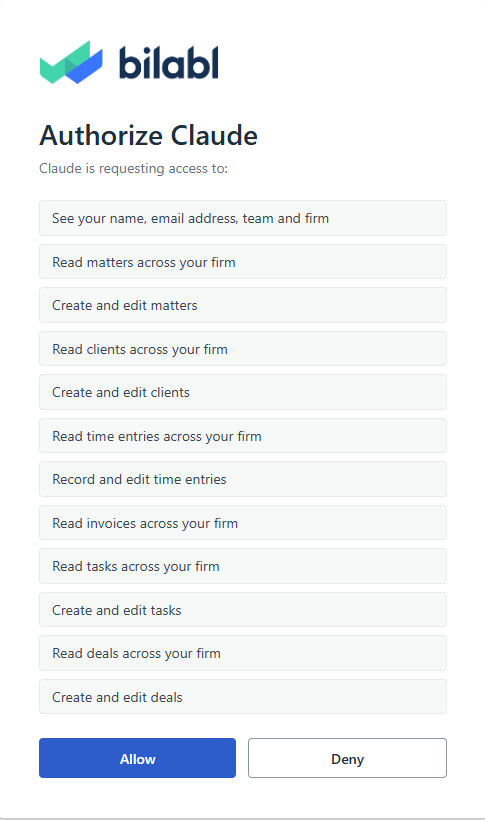
- On the bilabl authorization page, check what the AI agent asks to access, then select Allow.
bilabl saves every change an AI agent makes at once, without asking you first. If you want to check each change before the AI agent makes the change, use the approval setting in your AI agent, for example Needs approval in Claude. Your firm may require this setting. If you are not sure, ask your Administrator.
After you connect, ask your AI agent about your bilabl data in plain words, the same way you would ask a colleague.
Connect Claude
You can connect bilabl in Claude on the web or in the Claude desktop app. You cannot add bilabl in the Claude mobile app. On the Claude Free plan, you can add only one custom connector.
The video below walks you through how to connect Claude to bilabl.
To connect Claude:
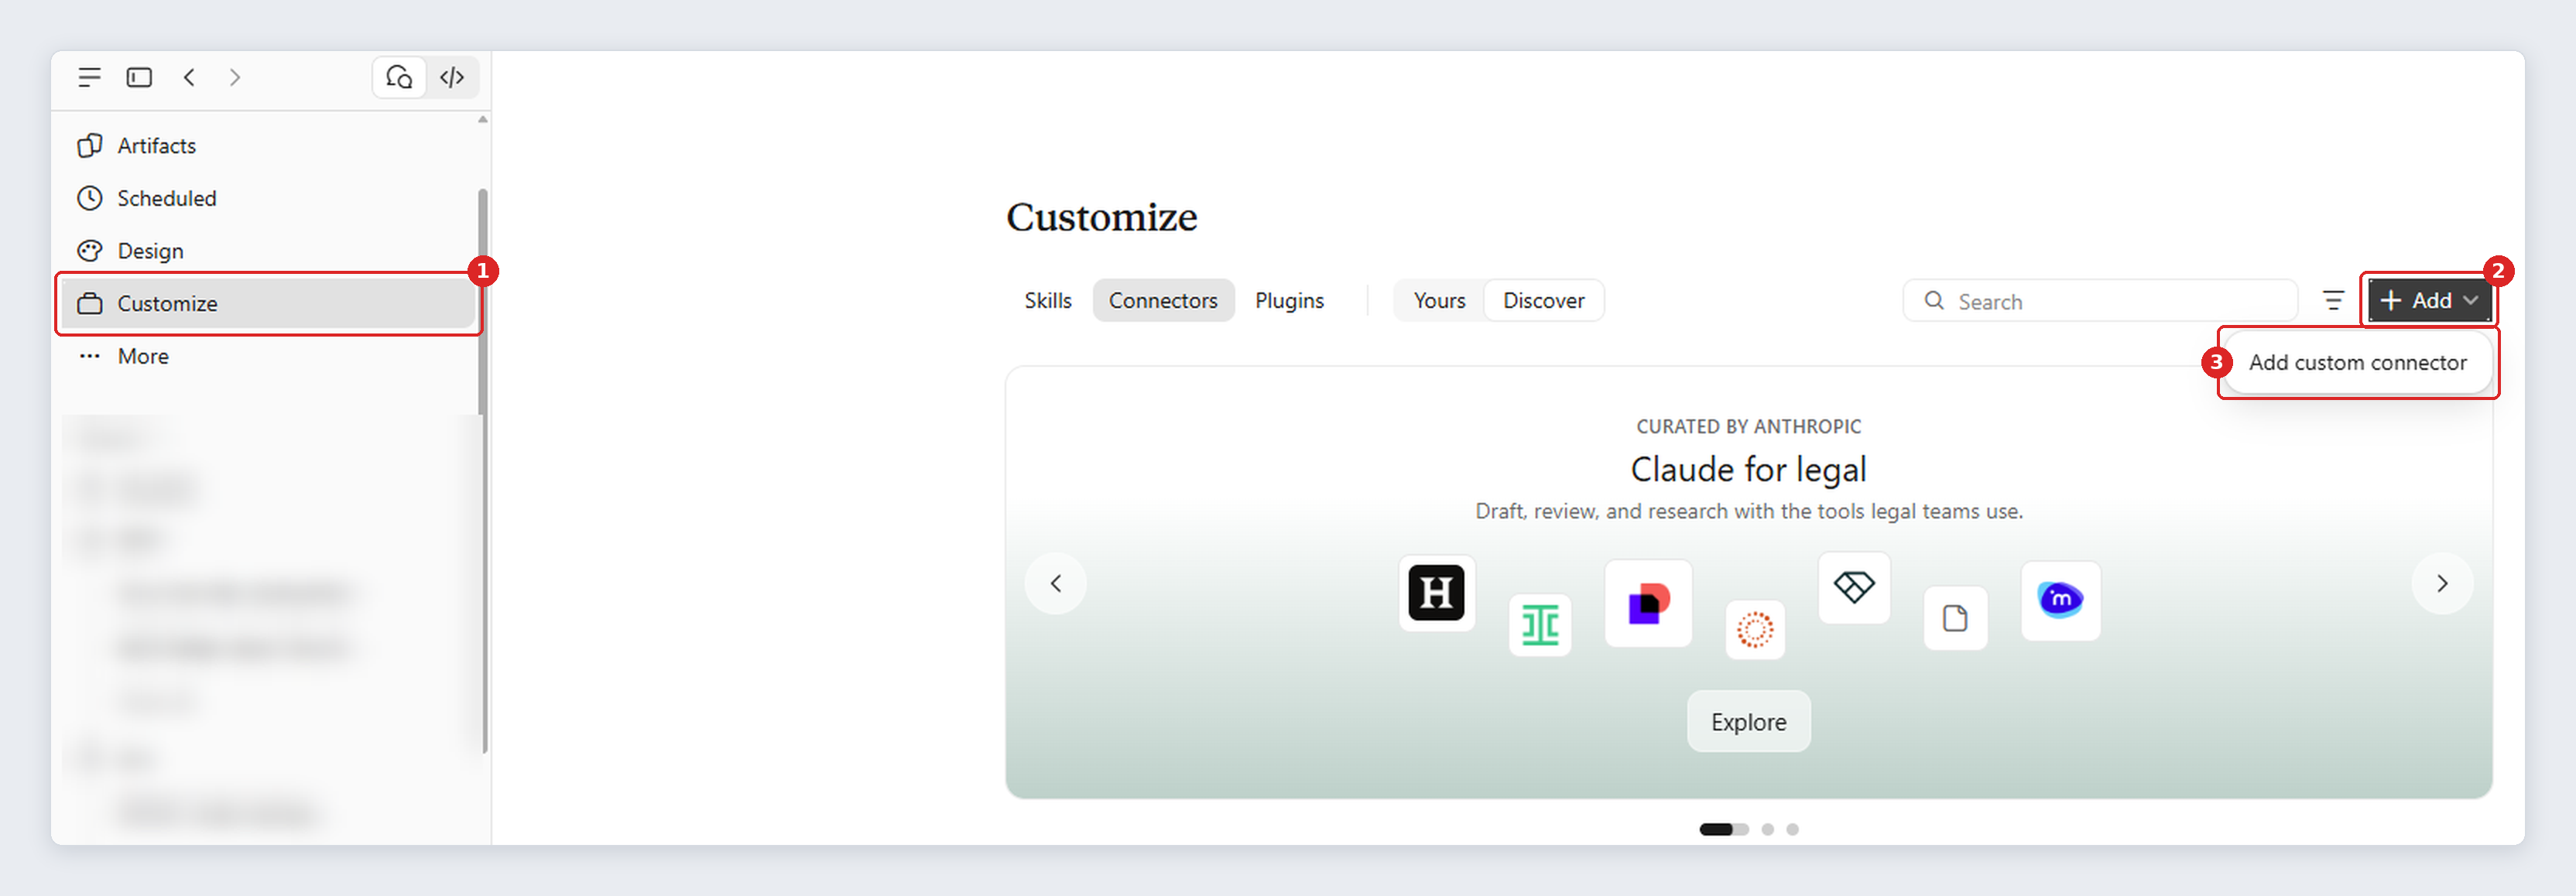
1. In Claude, select Customize in the left menu, select Connectors, select + Add, then select Add custom connector.
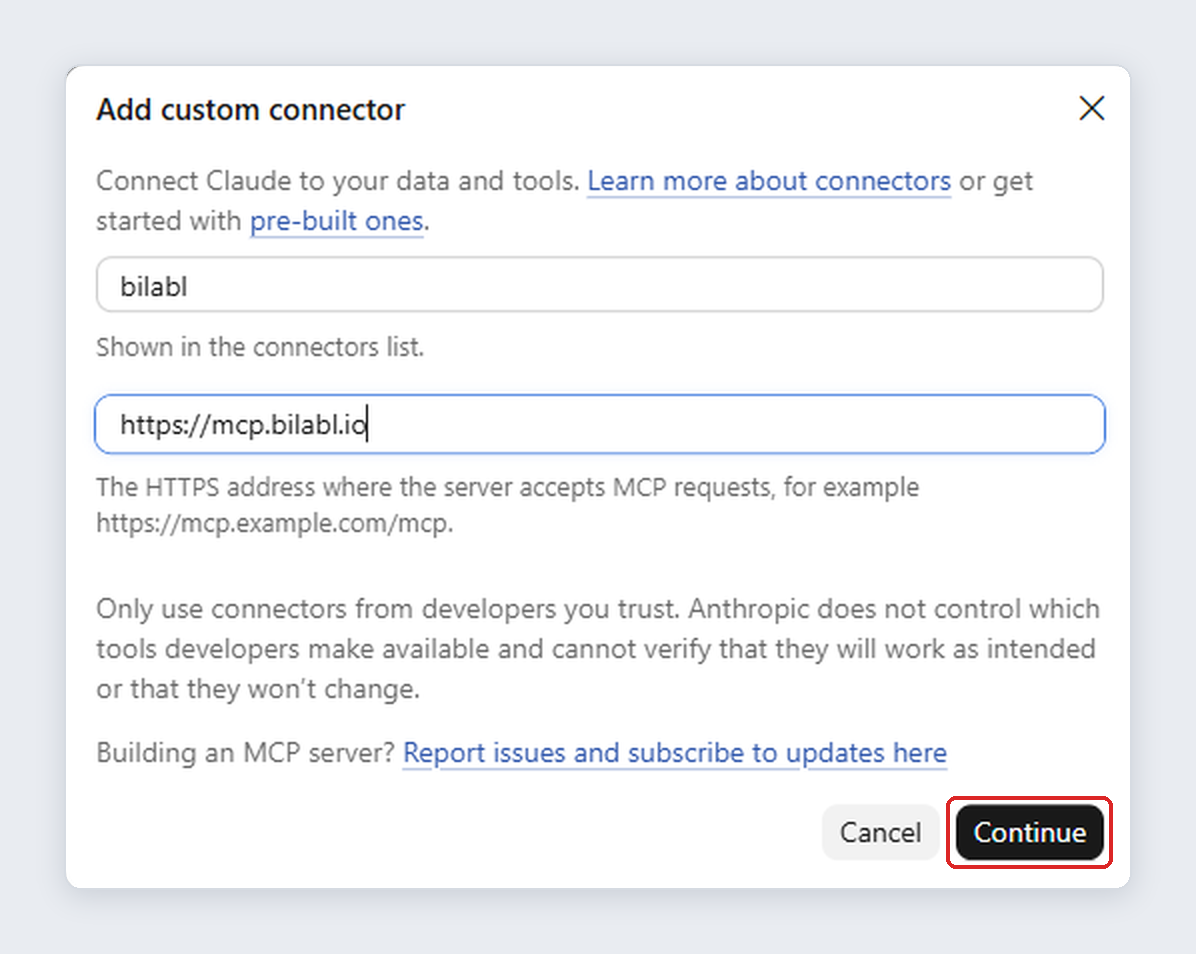
2. Enter bilabl in the first field and https://mcp.bilabl.io in the second field, then select Continue.
3. Select Connect, sign in to bilabl, then select Allow.
On the Team or Enterprise plan, a Claude Owner first adds bilabl for the whole organization in Organization settings > Connectors. Each user then selects Customize > Connectors, selects Connect next to bilabl, and continues from step 3.
After you connect:
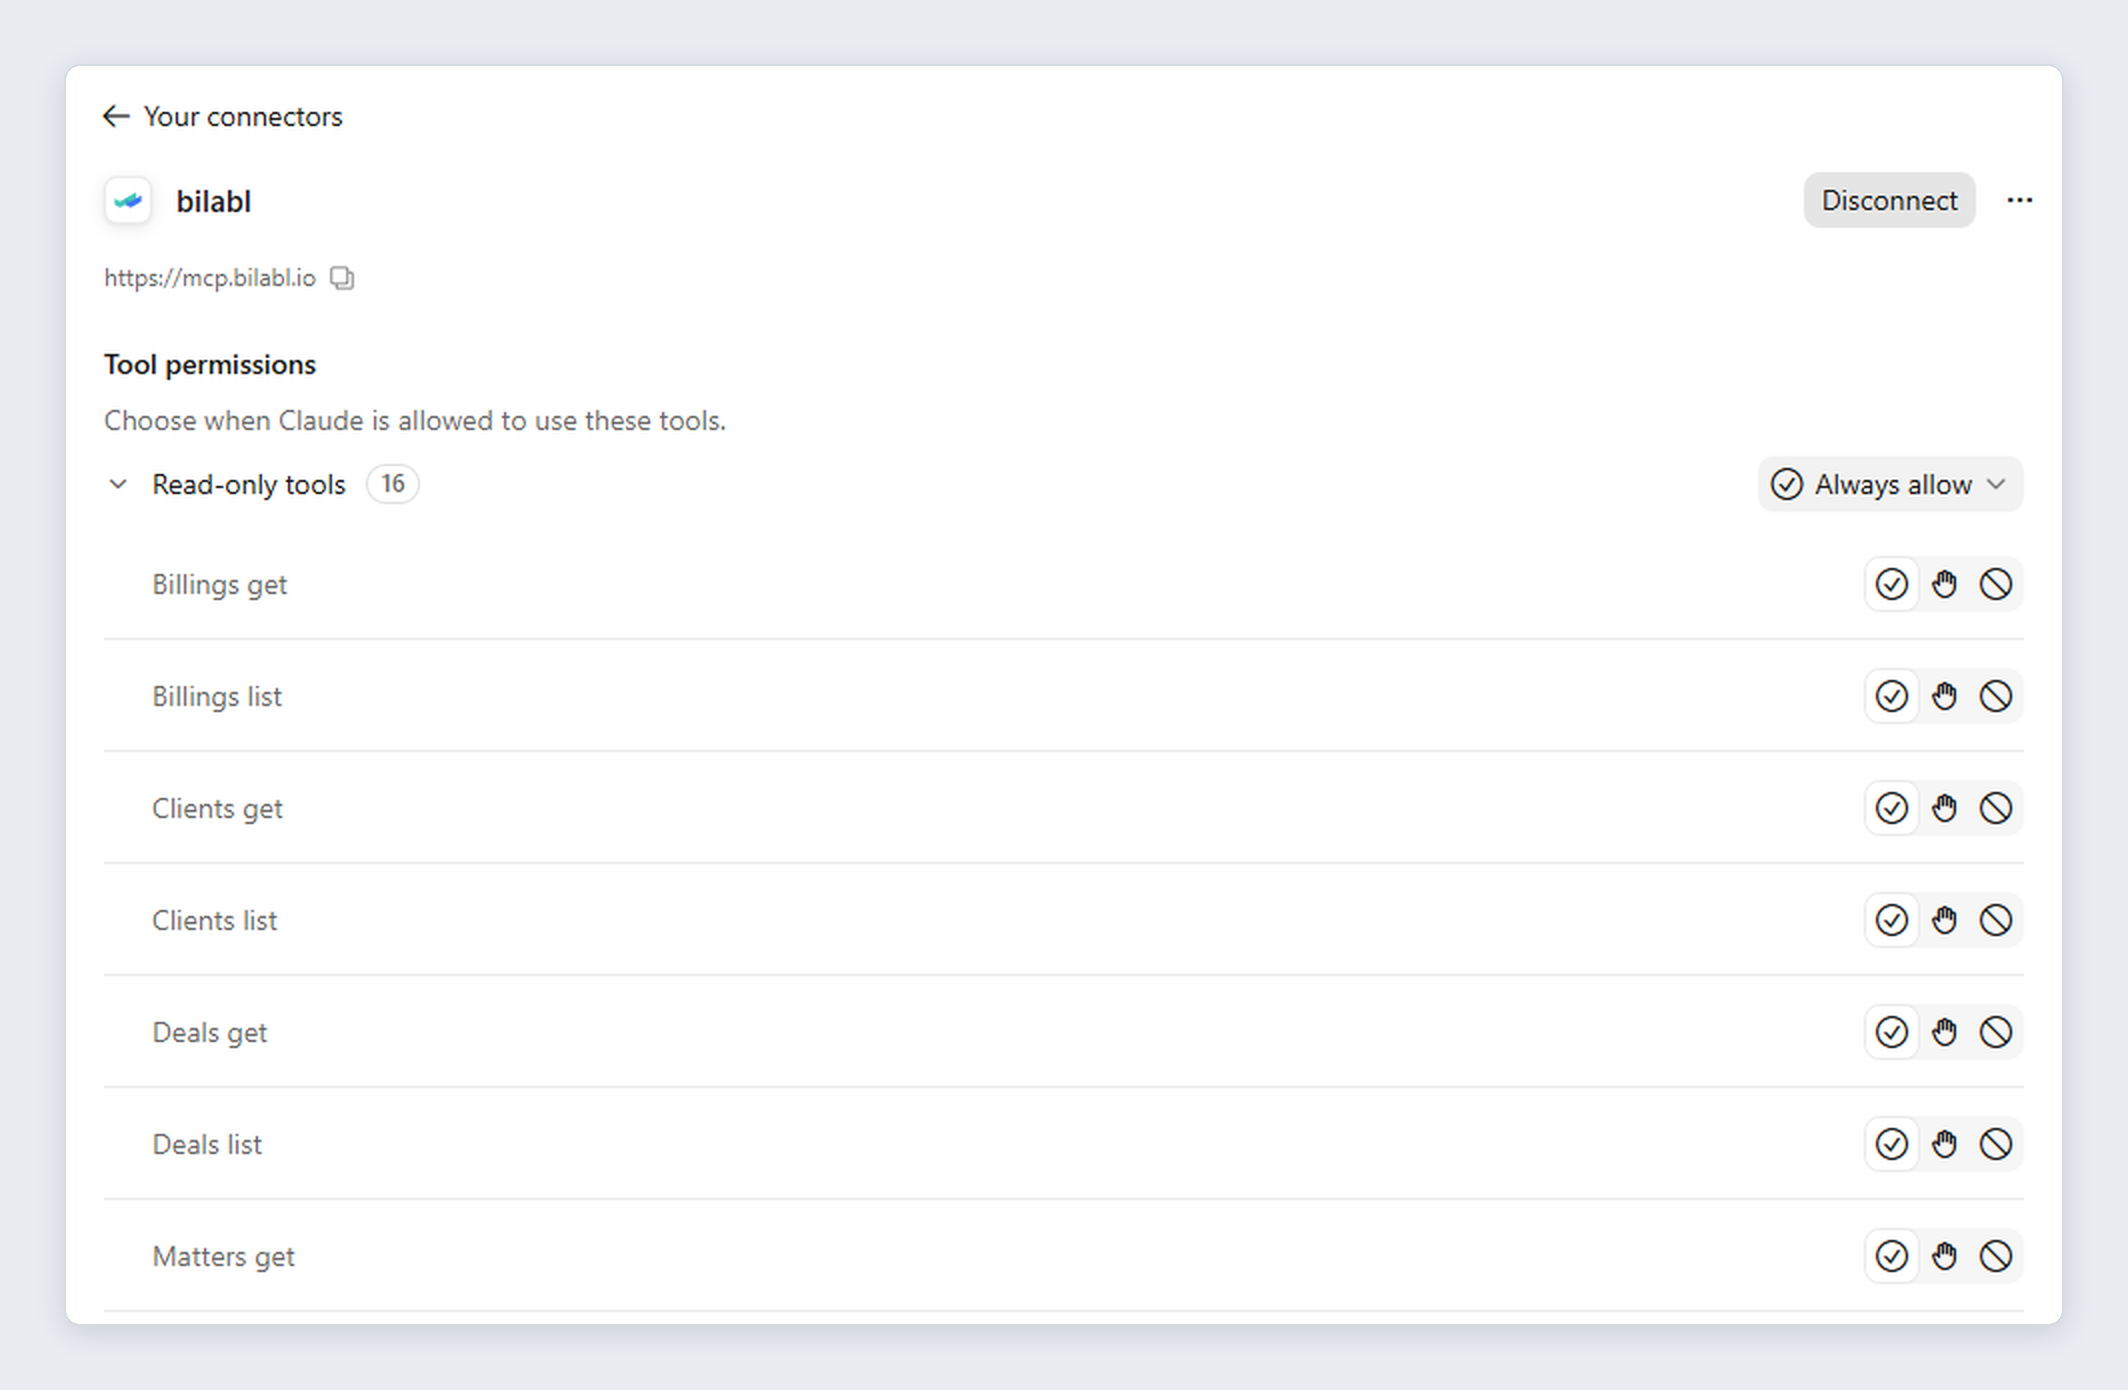
- To choose when Claude asks you first: select Customize > Connectors > bilabl. Under Tool permissions, choose Always allow, Needs approval, or Blocked.
- To use bilabl in a chat: select + > Connectors, and check that bilabl is switched on.
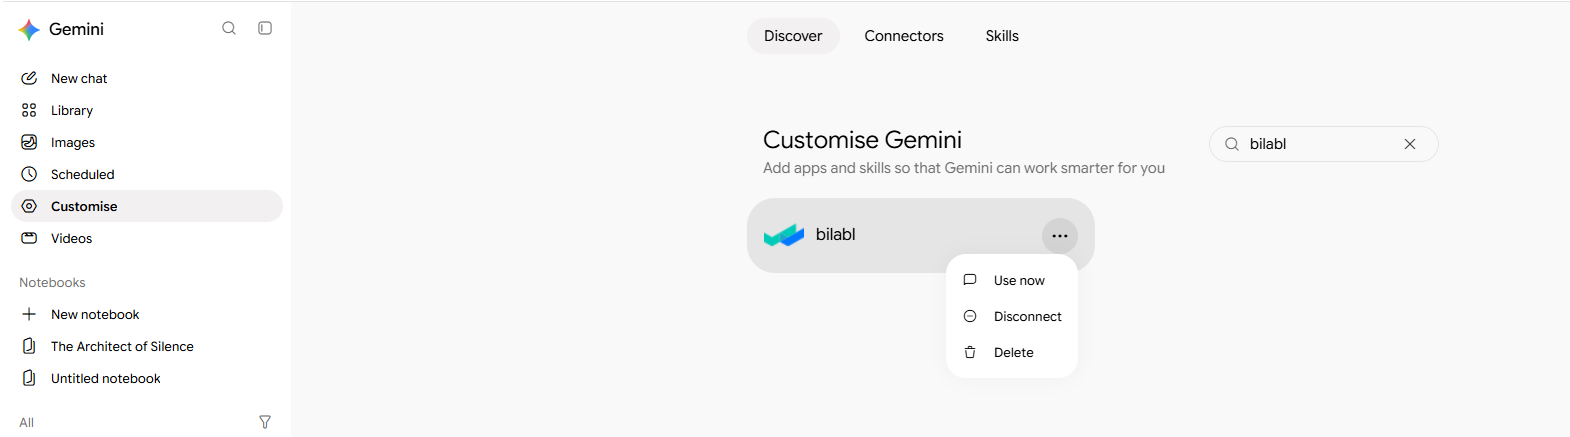
- To disconnect: select Customize > Connectors > bilabl > Disconnect.
Connect ChatGPT
You can connect bilabl in ChatGPT on the web or in the ChatGPT desktop app, on every ChatGPT plan, including the Free plan.
The video below walks you through how to connect ChatGPT to bilabl.
To connect ChatGPT:
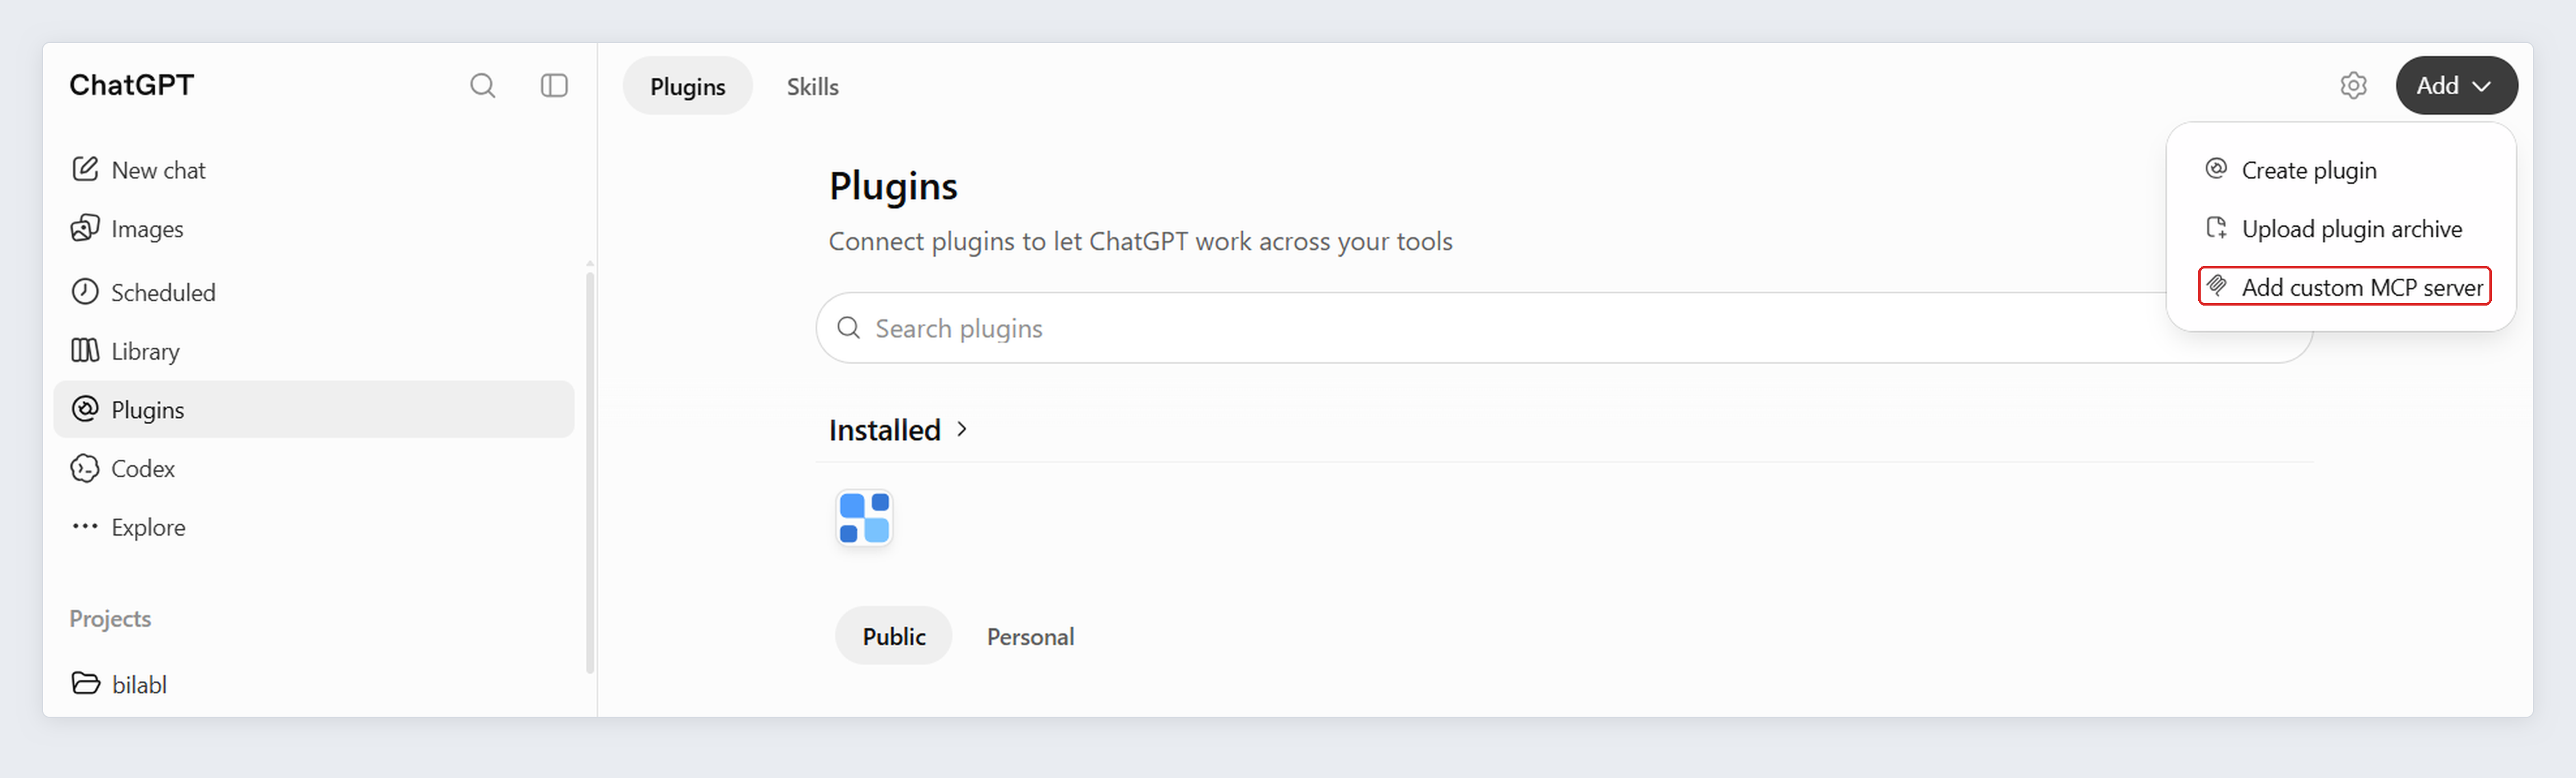
1. In ChatGPT, select Plugins, select +, then select Add custom MCP server.
2. Enter bilabl as the name and https://mcp.bilabl.io under Connection, then choose OAuth as the authentication.
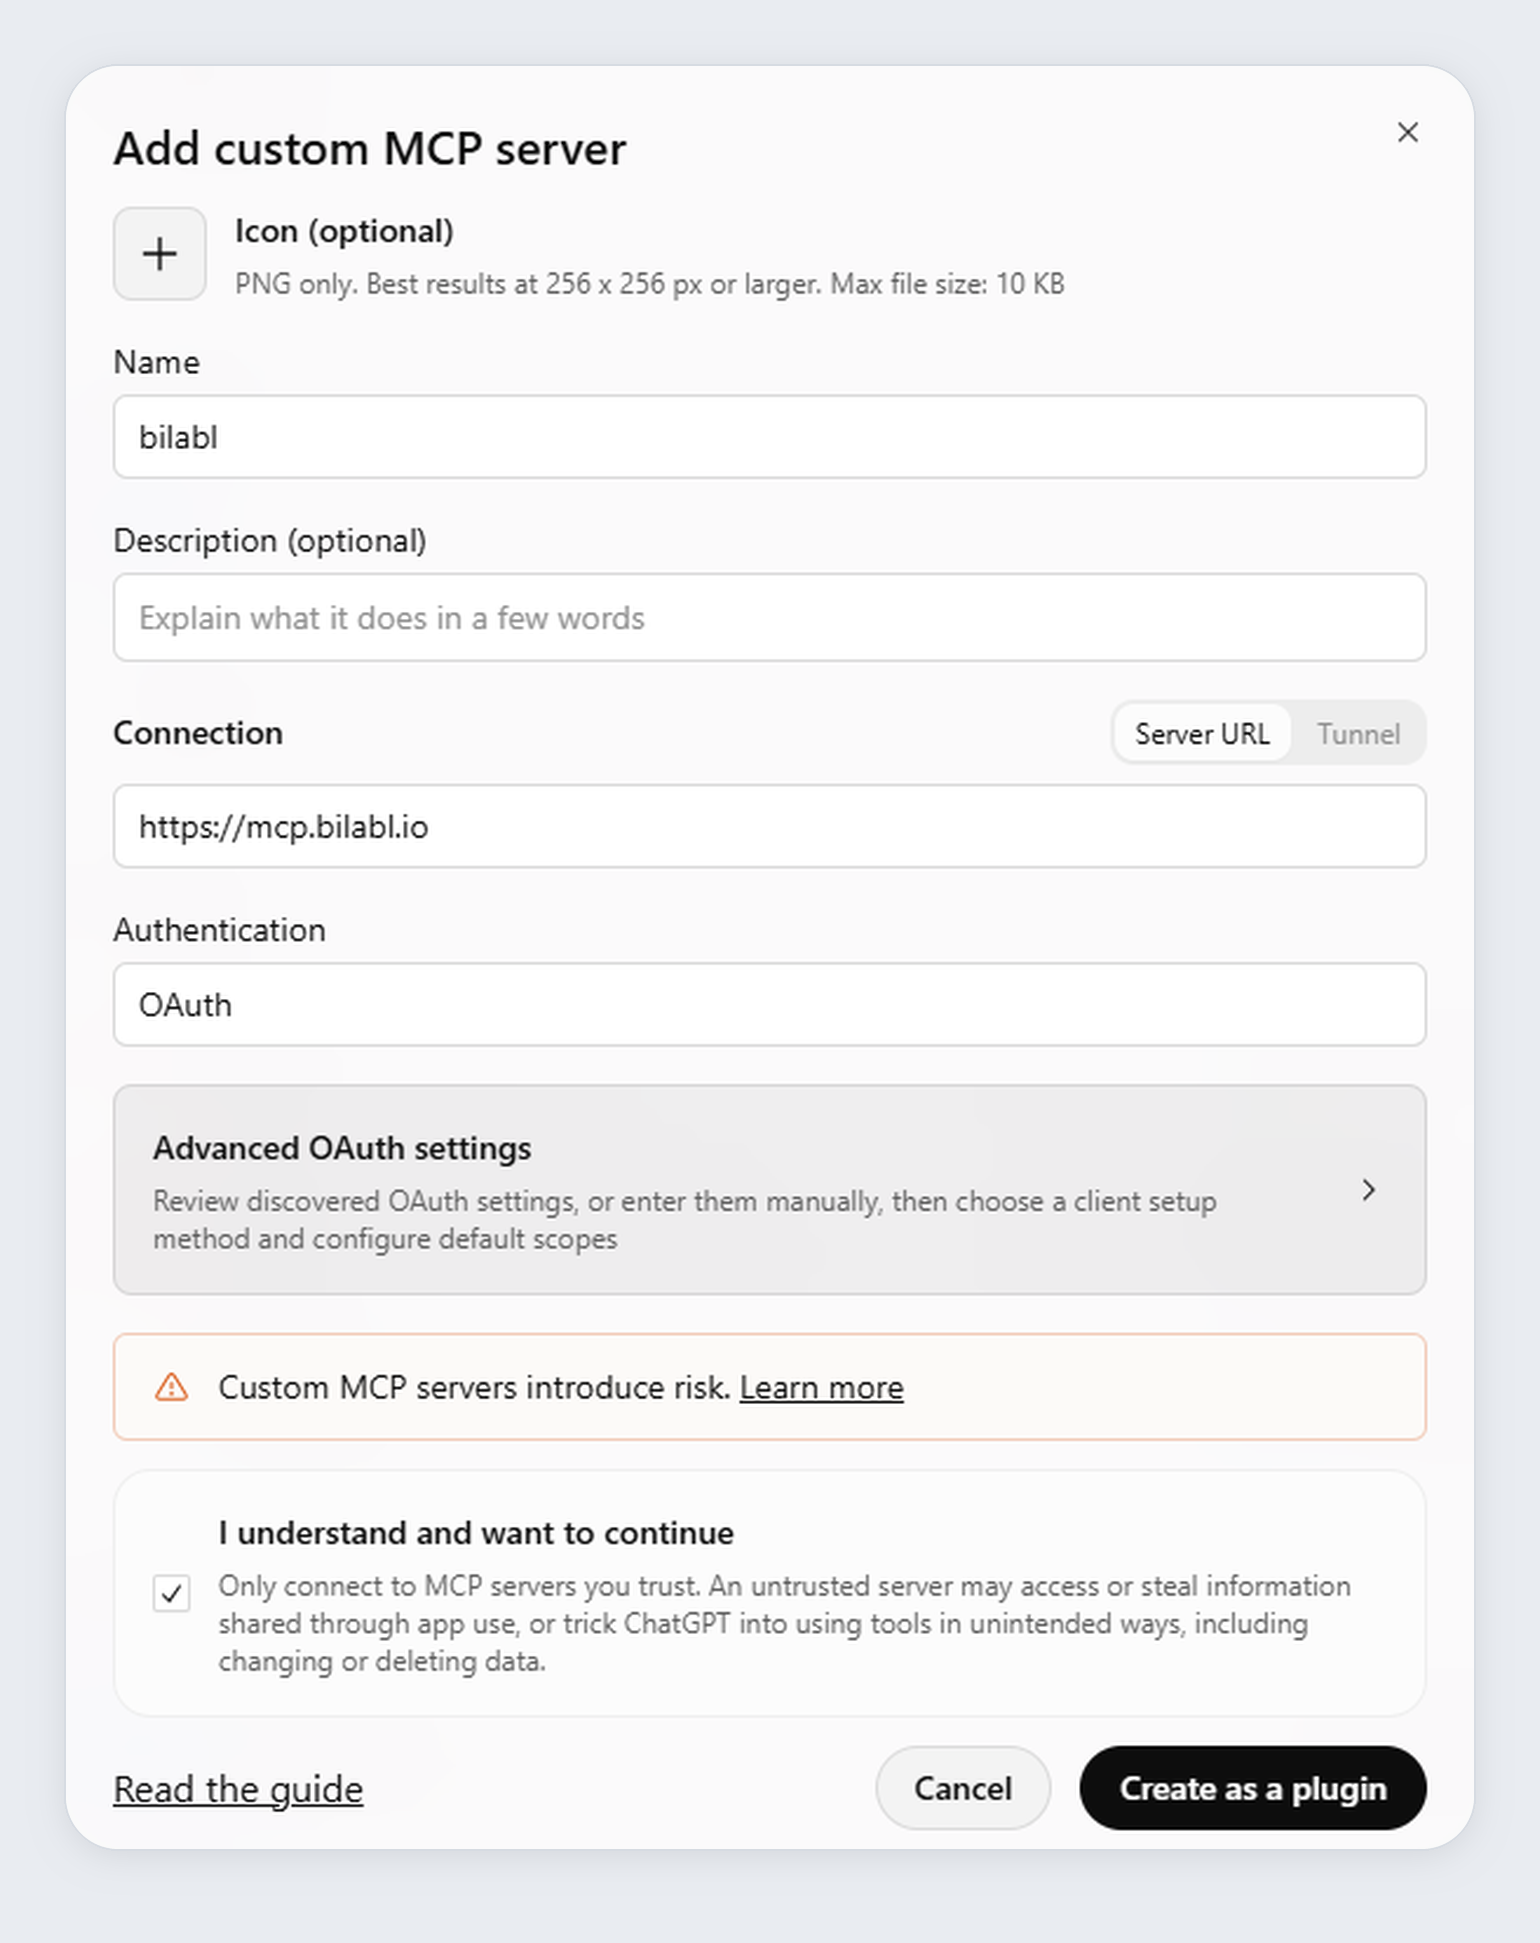
3. Select I understand and want to continue, then select Create as a plugin.
4. In the window that opens, select Connect, sign in to bilabl, then select Allow.
On the Business plan, only a ChatGPT admin or owner can do steps 1 to 3. The admin or owner then publishes bilabl for the whole workspace in Admin Console > Plugins > Manage Legacy Apps > Drafts > Publish, and each user continues from step 4. On the Enterprise and Edu plans, a ChatGPT admin decides which users can add bilabl.
After you connect:
- To use bilabl in a chat: type @ in the message box, then select bilabl. Select bilabl again for each message that needs bilabl data.
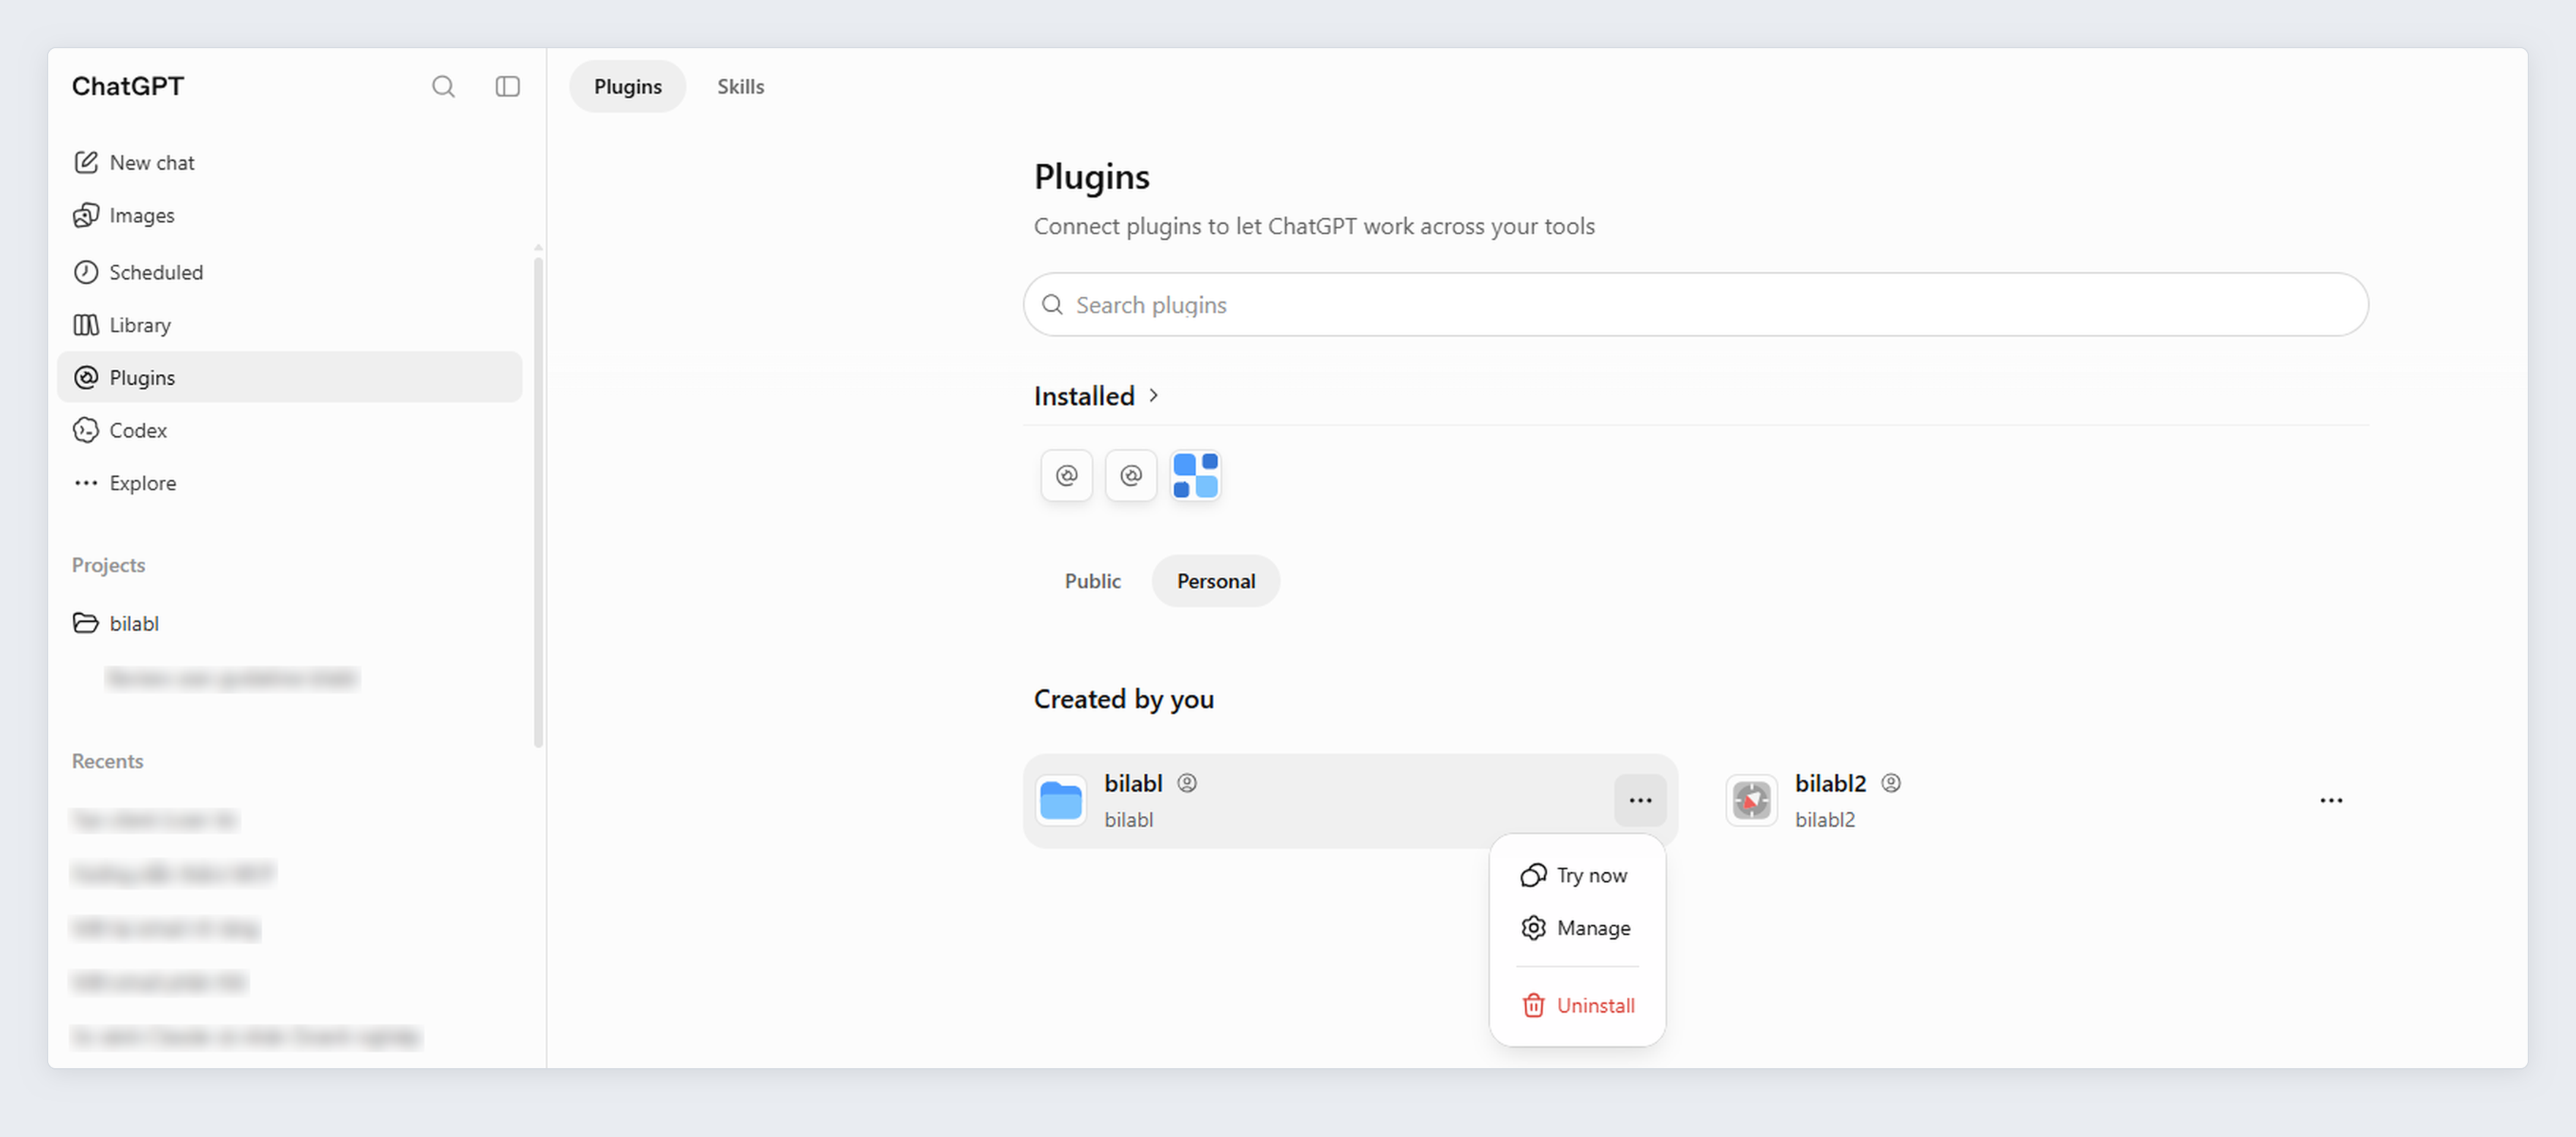
- To disconnect: select Settings > Plugins > bilabl. Next to your connected account, open the more options menu (•••), then uninstall the plugin.
Connect Gemini
You can connect bilabl in Gemini on the web or in the Gemini desktop app. After you connect, you can also use bilabl in the Gemini mobile app.
The video below walks you through how to connect Gemini to bilabl.
To connect Gemini:
1. In Gemini, select Customise in the left menu, select the Connectors tab, then select Custom.
2. In MCP server URL, enter https://mcp.bilabl.io, then select Next.
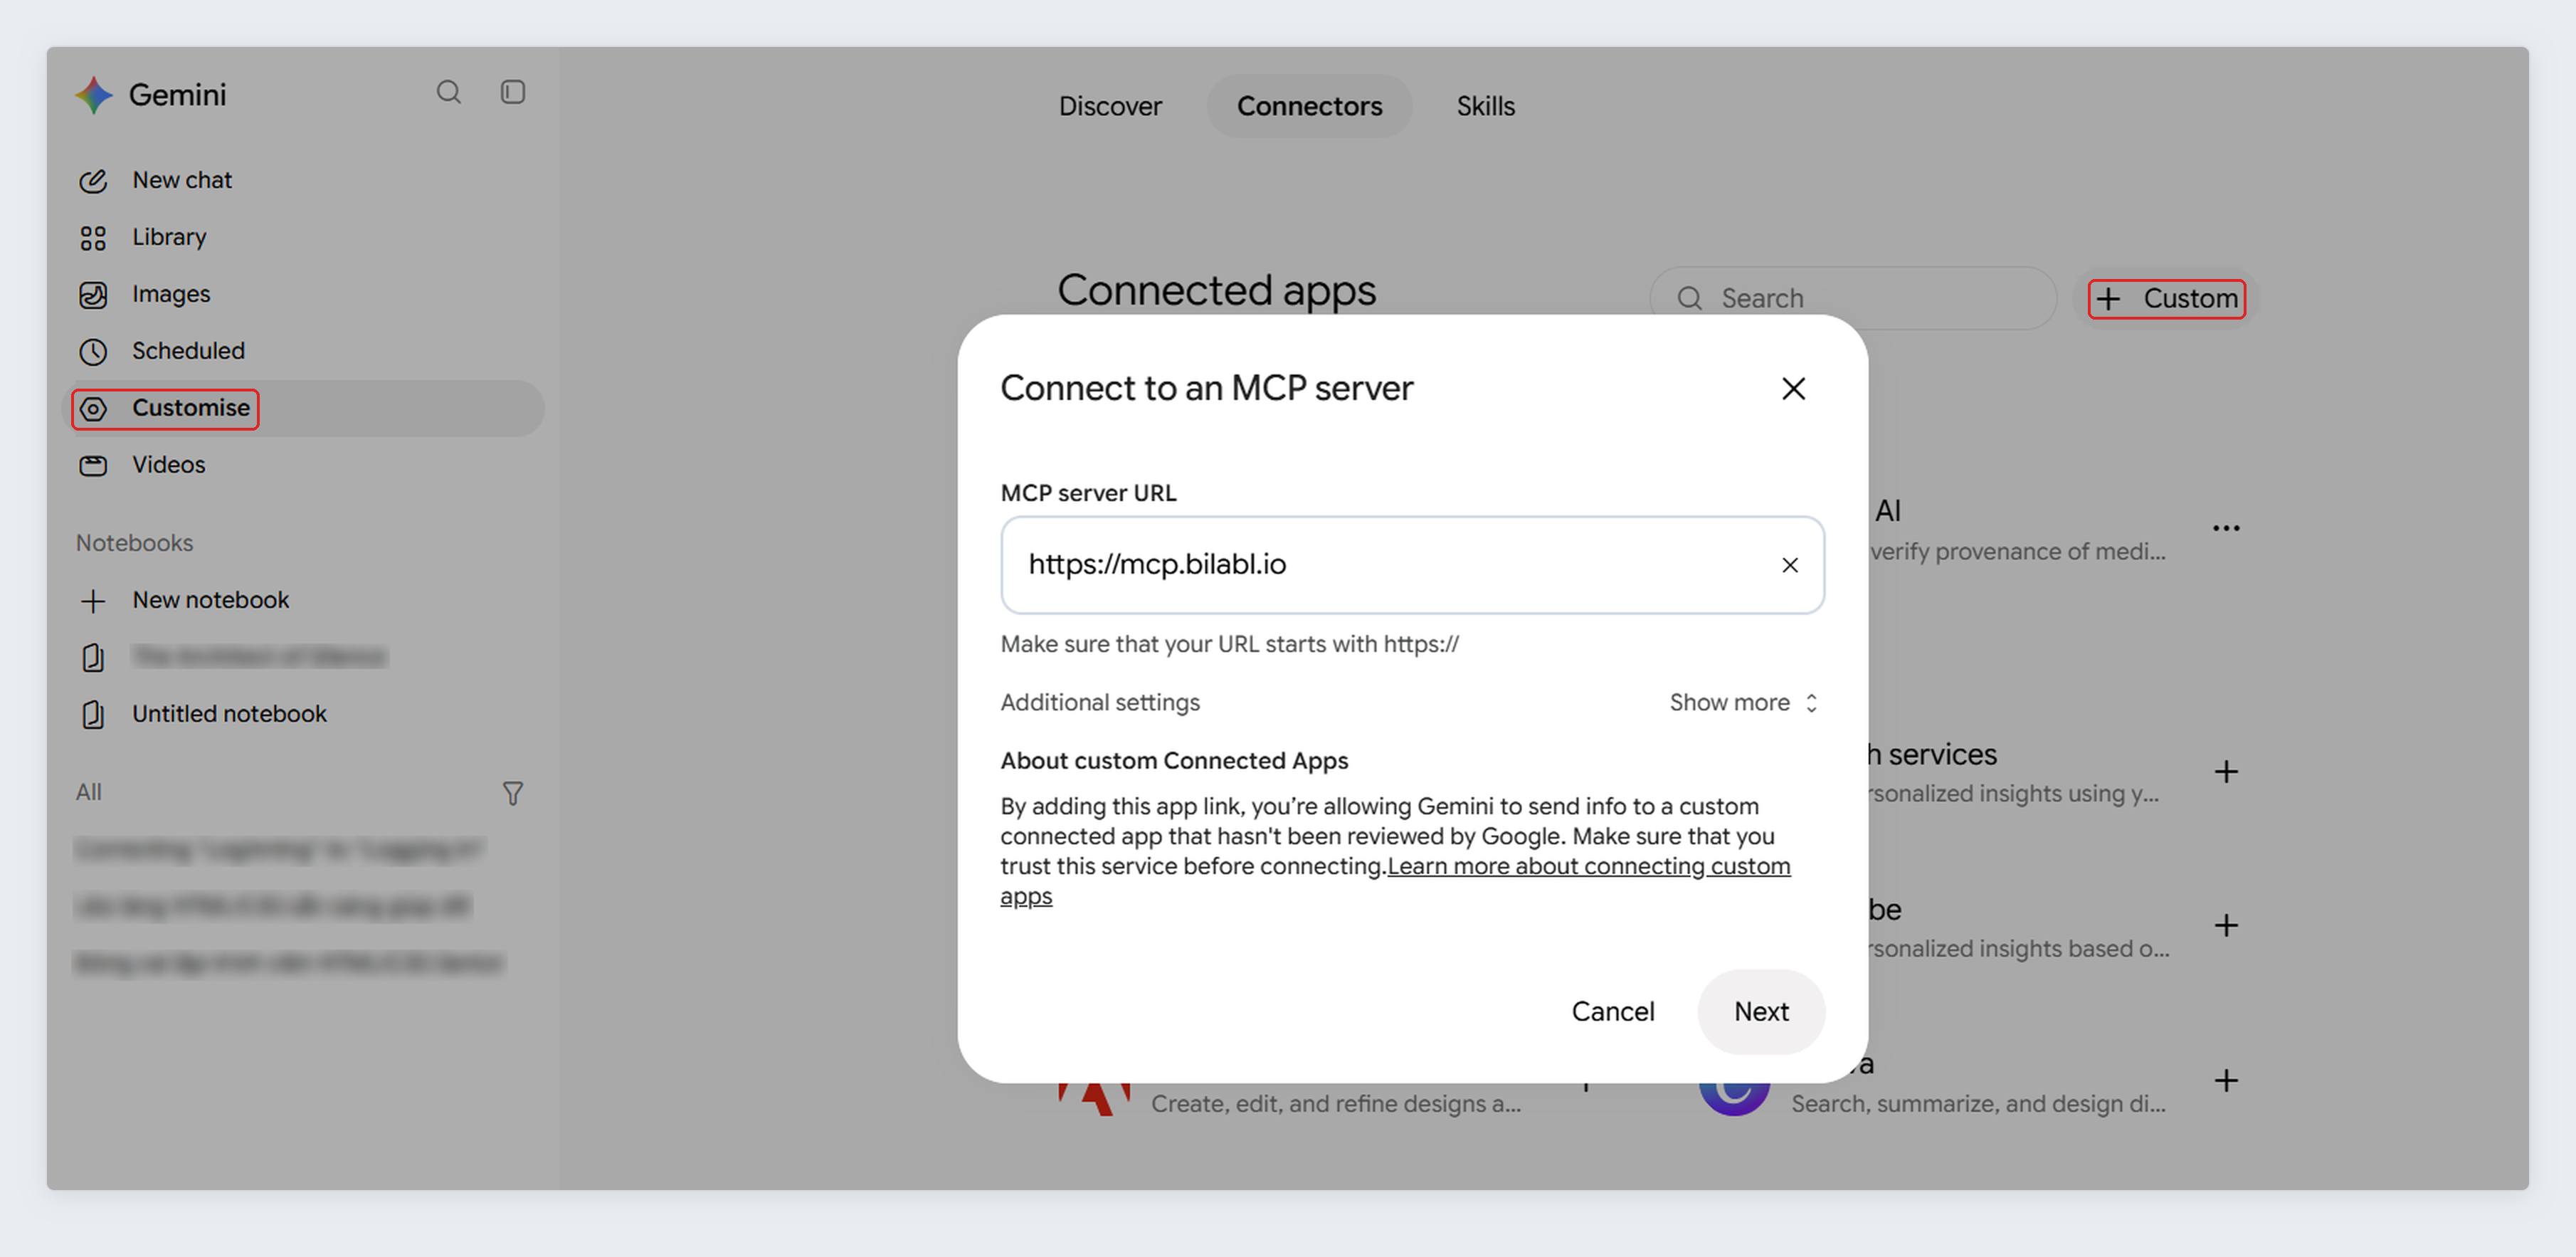
3. Select the checkbox to accept the security and privacy risks of connecting a custom app, then select Connect.
4. When Google asks you to confirm that you trust bilabl, select Agree and continue.
5. Sign in to bilabl, then select Allow.
6. Check that the app name is bilabl, then select Connect.
On the Business plan, only a Gemini admin or owner can add custom apps. The admin or owner then publishes bilabl for the whole workspace in Admin Console > Apps > Custom Apps > Drafts > Publish, and each user continues from step 4. On the Enterprise and Edu plans, a Gemini admin decides which users can add bilabl.
After you connect:
- To use bilabl in a chat: type @ in the message box, then select bilabl.
- Before Gemini changes data: Gemini always asks you to confirm before Gemini creates or changes data in bilabl.
- To disconnect: select Customise > Connectors. Next to bilabl, open the more options menu (•••), then select Disconnect. To remove bilabl from Gemini completely, select Delete instead, then select Remove to confirm.